Using Workflows
Transferring the BOM of a Vault Item to Fusion 360 Manage
With powerPLM (powerFLC) you can automate different scenarios when working within Vault Client and exchanging data with Fusion 360 Manage, for instance transferring the metadata of a Vault Item and its Bill Of Material information to Fusion 360 Manage.
This is very simple because powerPLM (powerFLC) offers the Transfer Item BOMs workflow example. So all you have to do is:
Guarantee existence of prerequisite workspace Items
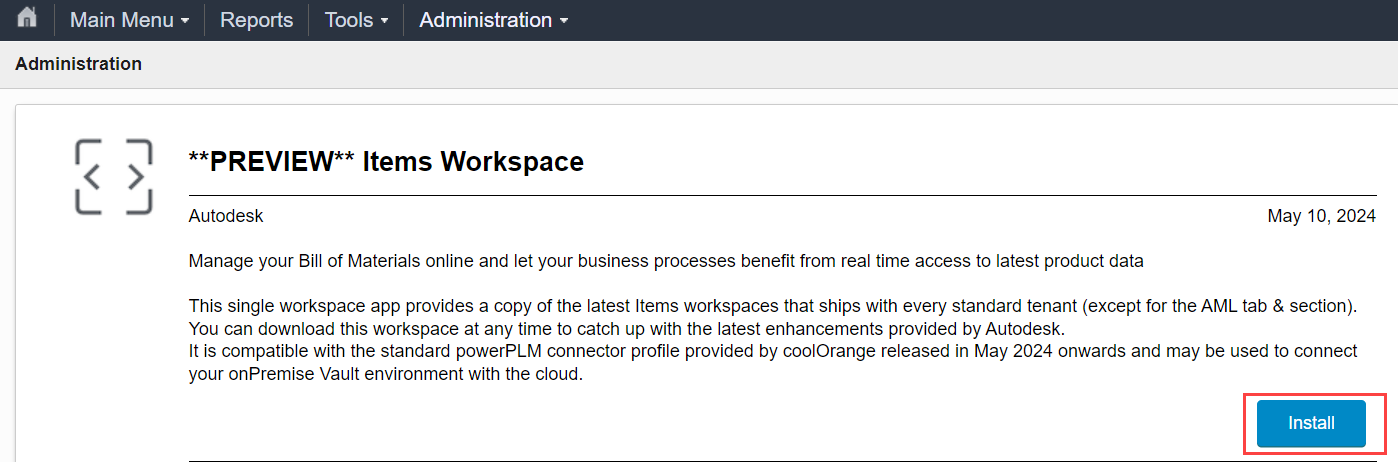
Autodesk’s default workspace “Items” is already configured to align with the Transfer Item BOMs workflow.
This workspace is available in all current Fusion Manage tenants.
If you don’t find this workspace in your tenant, simply install it throught “Administration -> Template Library”:
In this case, you also need to manually perform the following configuration steps:
In the Security tab: Assign the “Items [R/W]” role to your user’s group.
This makes the new “Items” workspace visible in your menu.In the Workspace Manager tab: Add the “Items” workspace as a new “Managed Items Tab” relationship to the “Change Orders” workspace
(required for the Change Management workflow)Usually there is already a “Product Development” category in Fusion Manage menus.
The new “Items” workspace can then be found under “Product Development_1”. Optionally, you can move it via Administration -> System Settings -> Main Menu Designer.
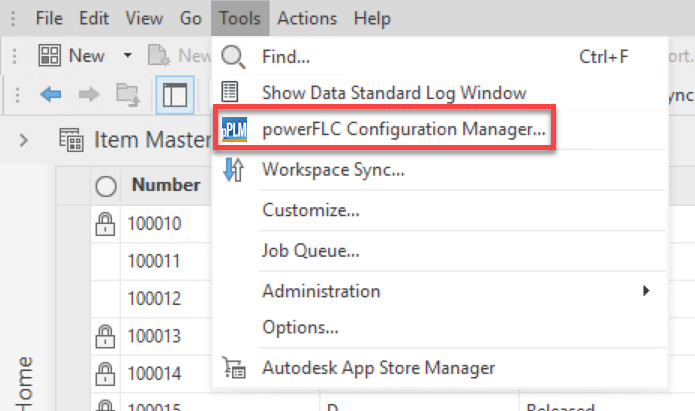
Connect Vault with Fusion 360 Manage
Please ensure that your tenant is properly configured to allow connections from the Vault Client and your Job Processor.
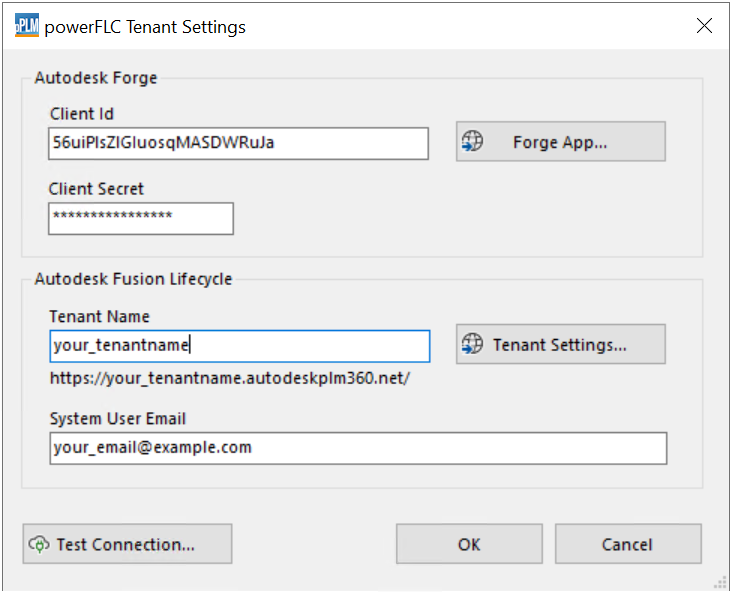
Then open the Vault Client and enter the required Fusion 360 Manage Credentials for authentication.
Note
The system user configured here is not used for the item transfer on the Job Processor.
Instead, Items and BOMs are created or updated in Fusion Manage under the name of the user who released the Item in Vault and queued the workflow job.
Therefore, an email address must be configured for all Vault users that corresponds to accounts in your Fusion Manage tenant.
Assign the user accounts to the Engineering group!
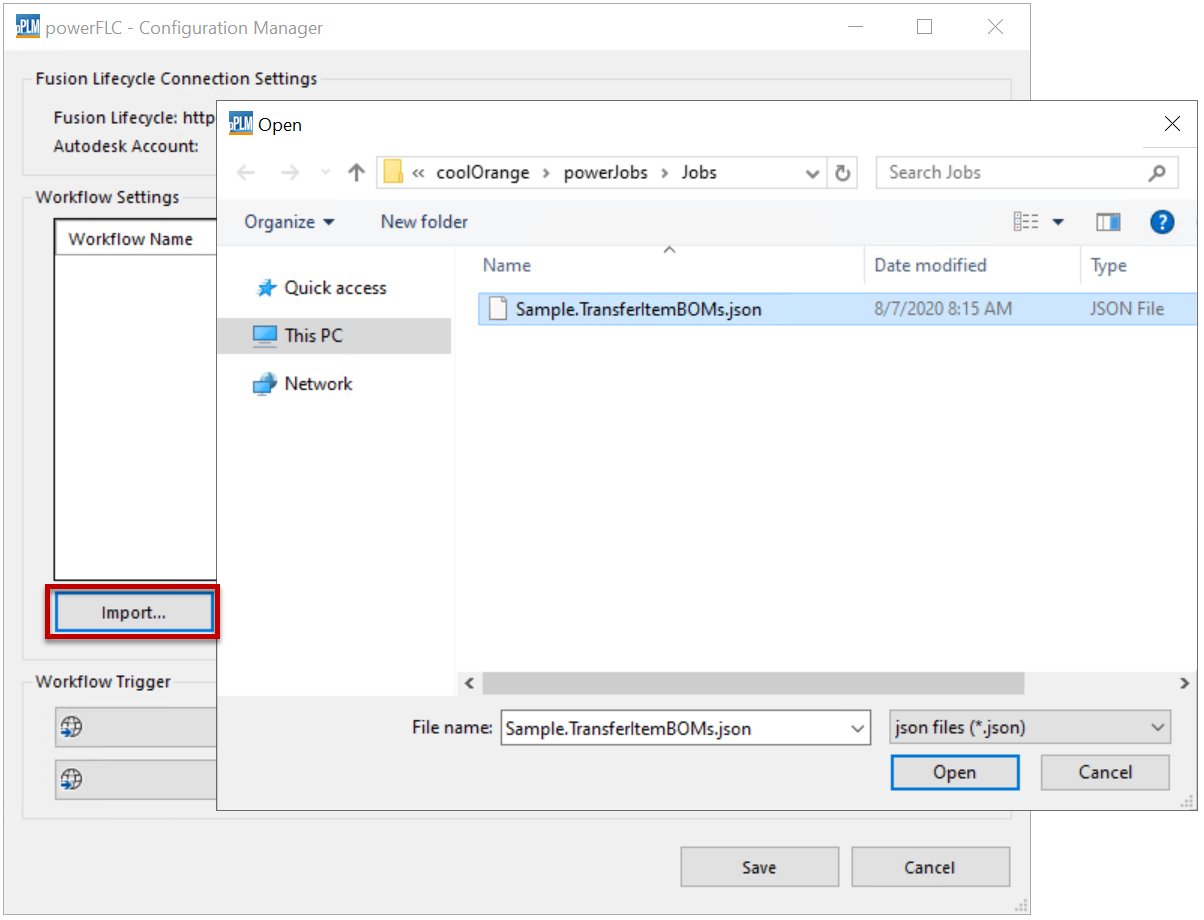
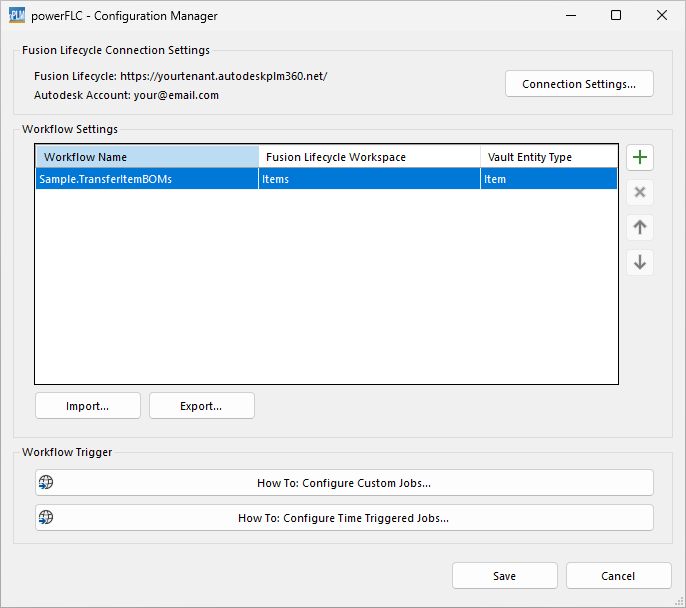
Import the configuration using following file: %ProgramData%\coolOrange\powerJobs\Jobs\Sample.TransferItemBOMs.json.
If required adapt the workflow settings or create the properties in Vault and/or FLC that are missing.
Finally press Save.
Trigger Job for Workflow
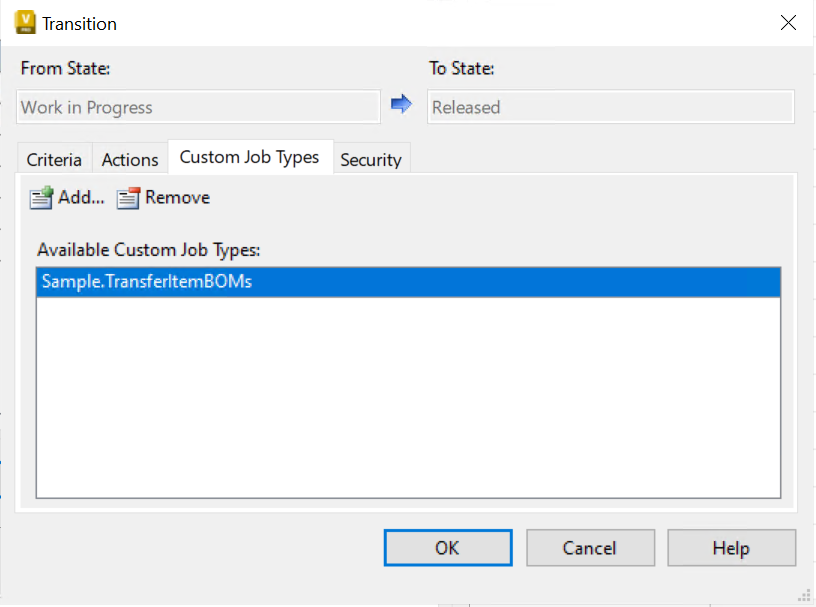
Configure a Vault lifecycle state transition for items to trigger the Job Type: Sample.TransferItemBOMs on a lifecycle change.
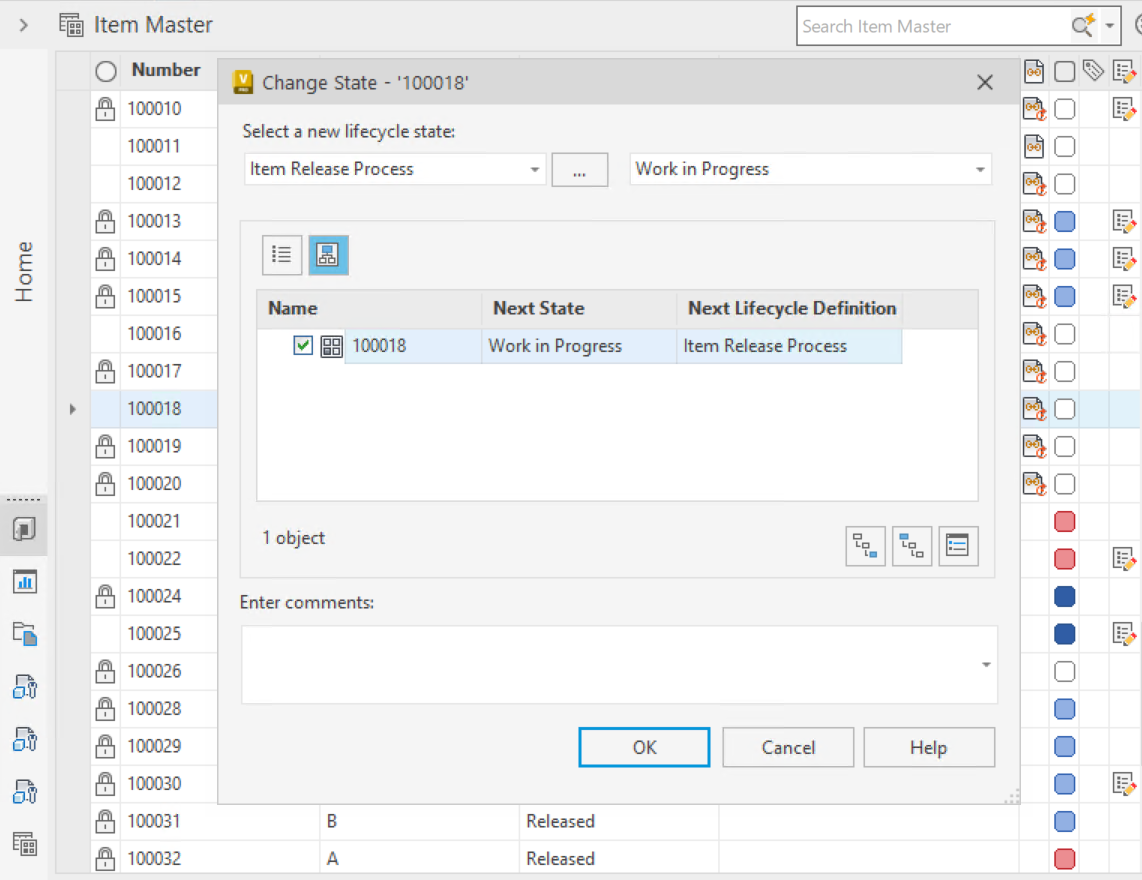
Afterwards select an Item in Vault and change its lifecycle state to the respective state.
Job Processor
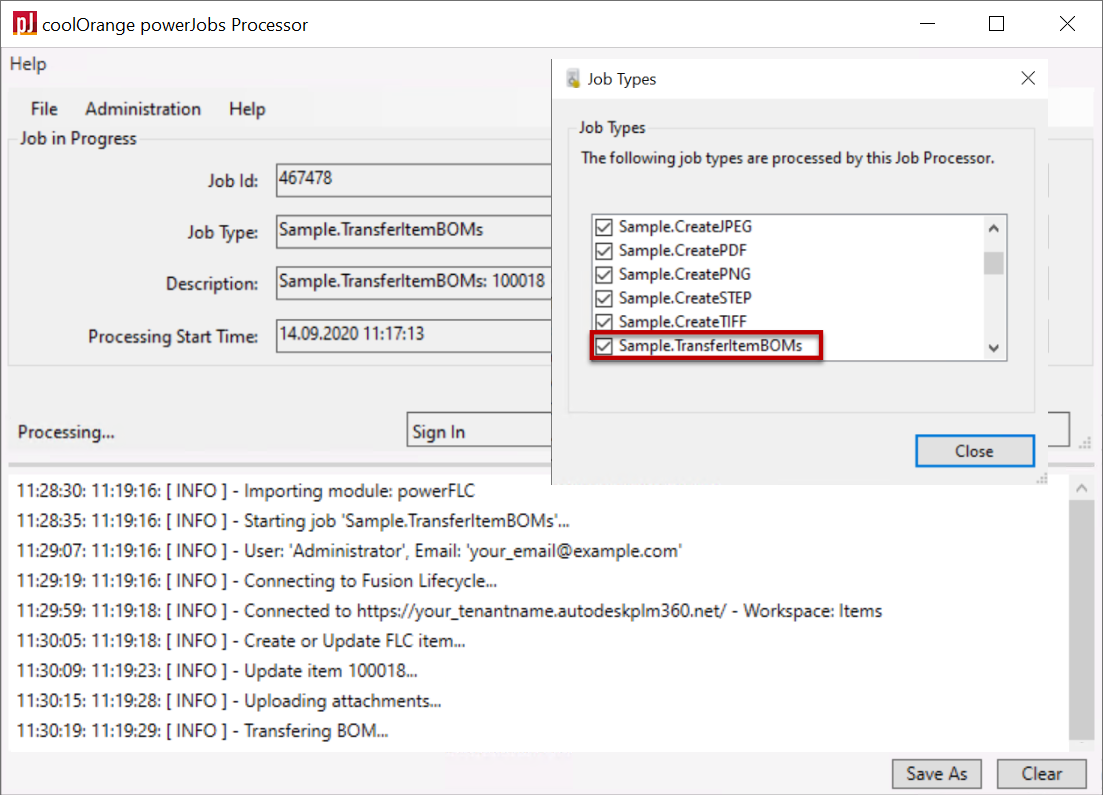
In order to execute the job you have to start the Job Processor.
We recommend using the powerJobs Processor which can be started using the shortcut on the Desktop or in the StartMenu.
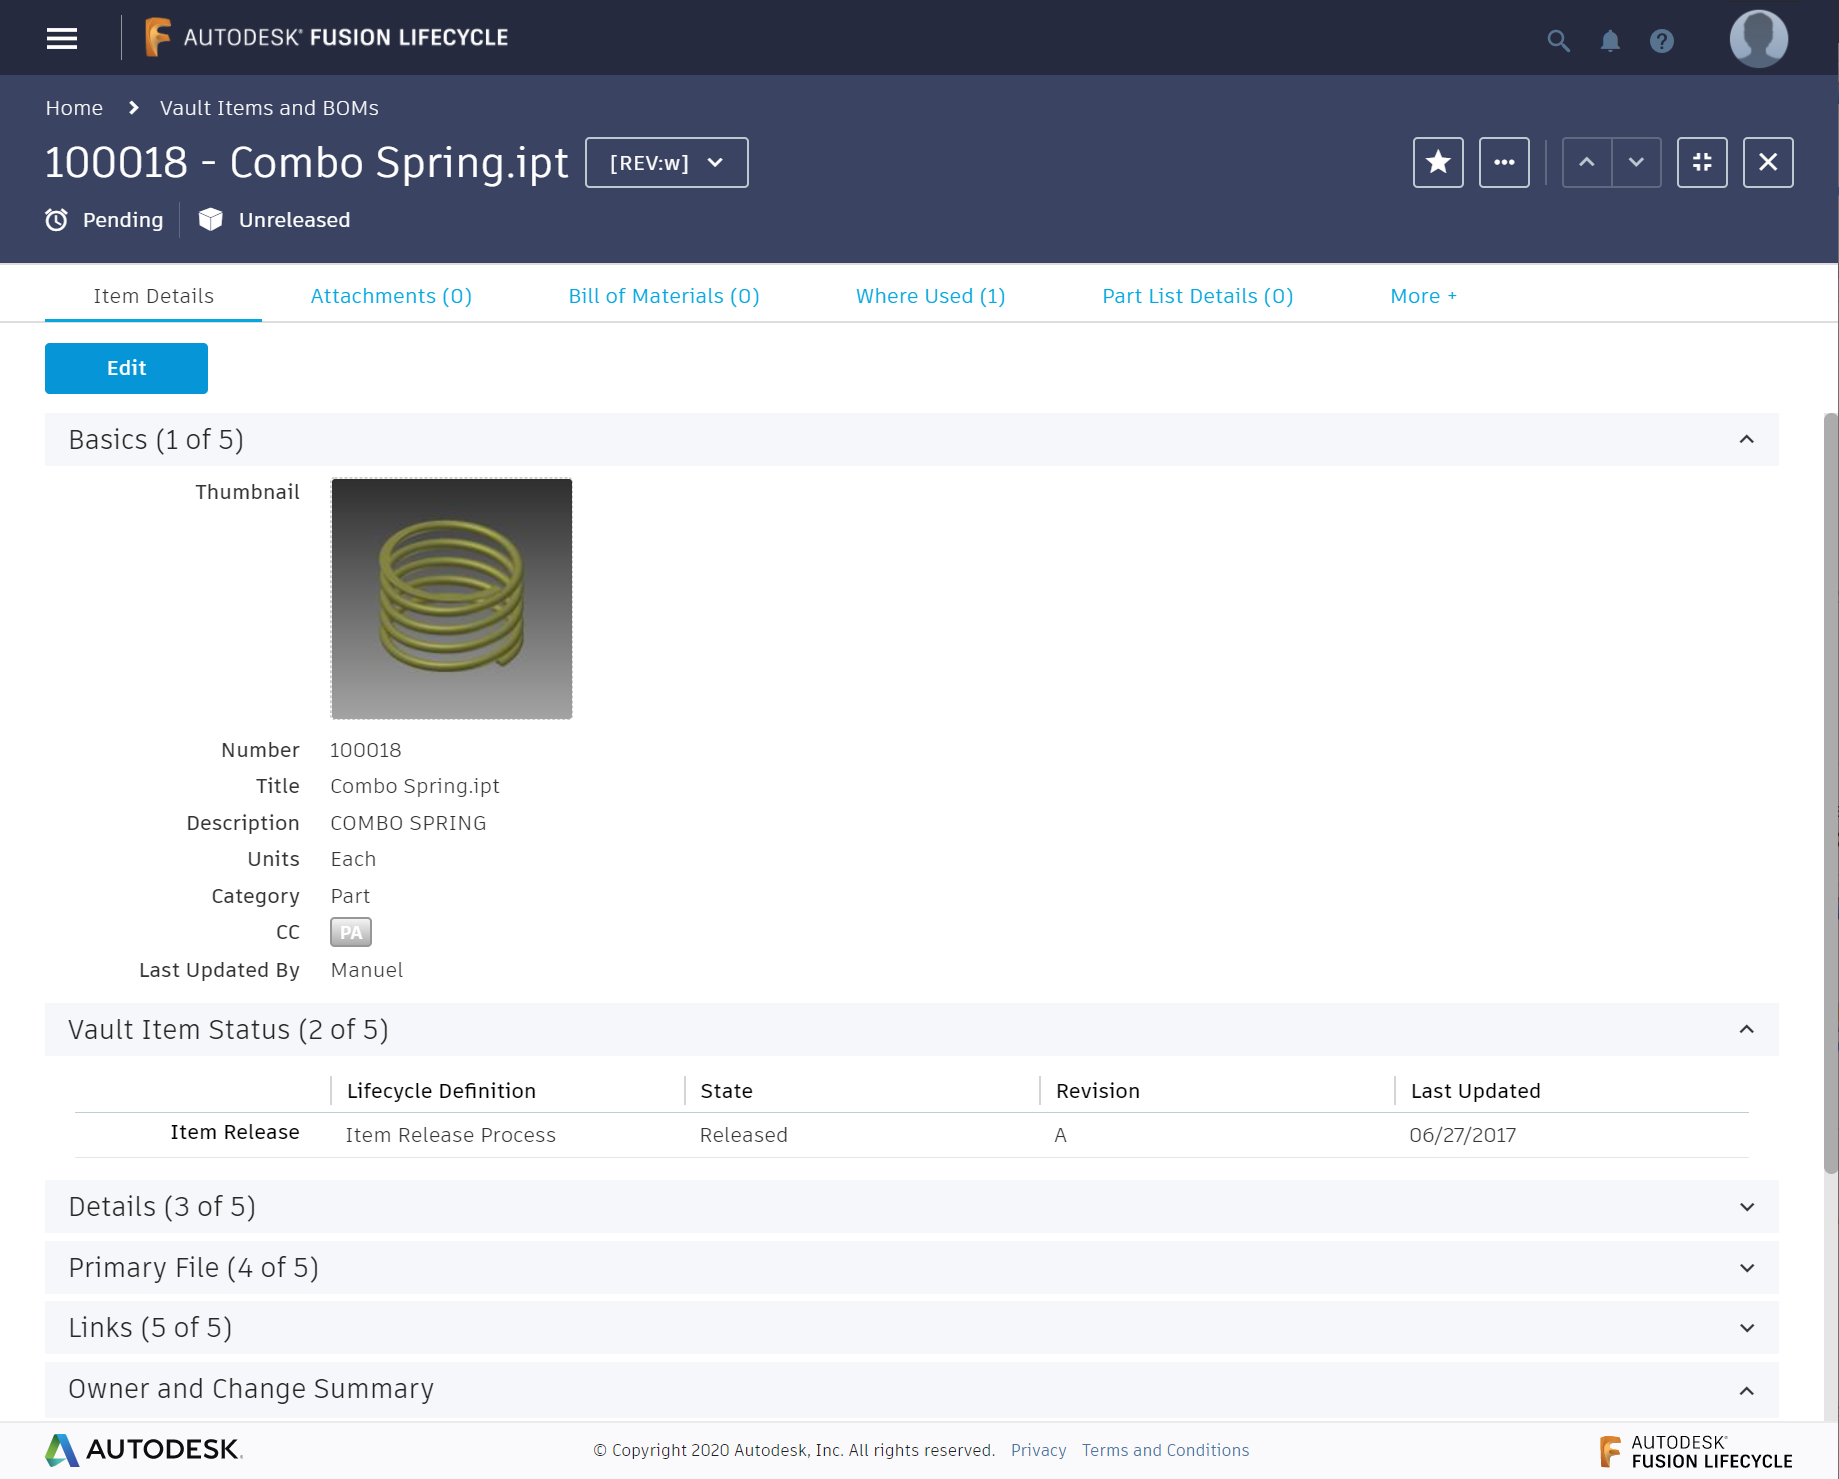
Result
After the Job Processor has finished processing the Job, the item and its mapped Vault Properties, Attachments and Bill of Materials should habe been successfully transferred to your “Items” workspace in Fusion Manage:
Note
To make the Vault Thick and Thin Client buttons work, you have to customize the calculated “Actions” field in Fusion Manage under Administration -> WorkspaceManager -> Items -> Item Details Tab.
Replace the text your-server-name in the “Computed Field Formula” with the correct name of your ADMS host.