Getting Started
If you are new to powerPLM (powerFLC), topics in this section will help you quickly start getting the best of the product:
Before you are able to use your Fusion 360 Manage tenant you have to make sure that the tenant is configured as described below.
Configuration in Fusion 360 Manage
Whitelisting the Forge App
Fusion 360 Manage has to be configured to allow communication with your Forge App.
Create an App
If you don’t already have a Forge App, please create an App for powerPLM in your Forge portal.
In order to allow connecting powerPLM (powerFLC) via your registered apps credentials, Fusion 360 Manage needs to know and allow them.
This can be done with following steps:
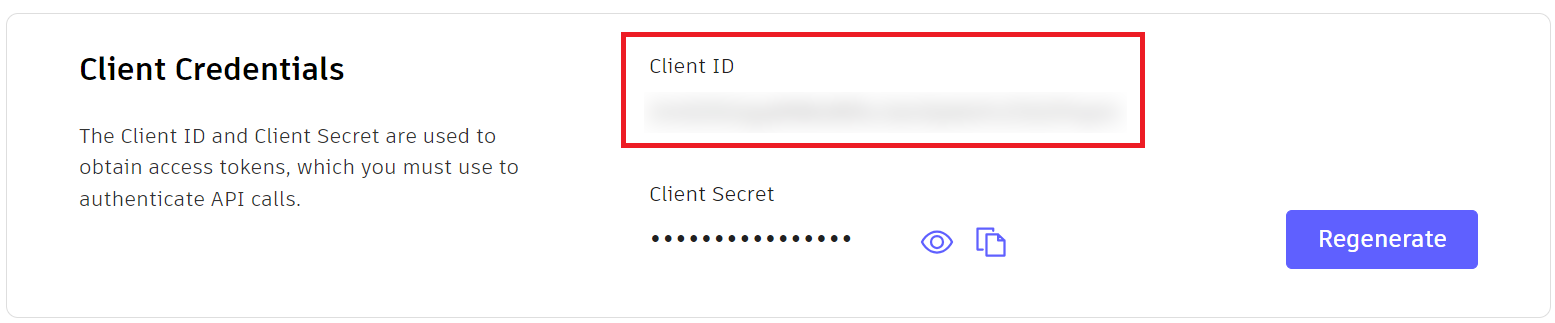
Open the My Apps section of your Forge app and copy the Client ID of your app
Go to your Fusion Manage Site, click the burger menu on the top left -> Administration -> System Configuration
Click on the General Settings link
In the section Security Settings, add the Client ID to the Whitelist:
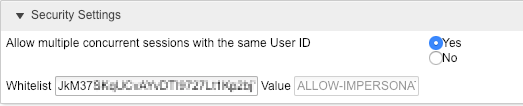
Change the setting “Allow multiple concurrent sessions with the same User ID” to Yes.
Press Save
Security Settings
The user accounts that perform requests on Fusion Manage must be be active in the system and have the appropriate workspace permissions.
Grant read/write permissions to all workspaces that are configured in your workflows, by adding all the necessary users to the relevant groups and roles.
Autodesk recommends assigning the users to the “Engineering” group, which already contains the necessary permissions for our sample workflows.
In addition, for the default “Items” workspace, it is currently important to also add them to the “Employees” group to grant access to all sections and fields in the Item Details tab (Autodesk plans to simplify this with “Engineering” soon).
For a newly created workspace, such as an installed Items Workspace template, you can follow these steps:
In your Autodesk Fusion Manage site, click on Administration → Security
For the respective user, click on the Groups link
Add the user to the “Engineering” group
Press Save
Click on the Roles tab
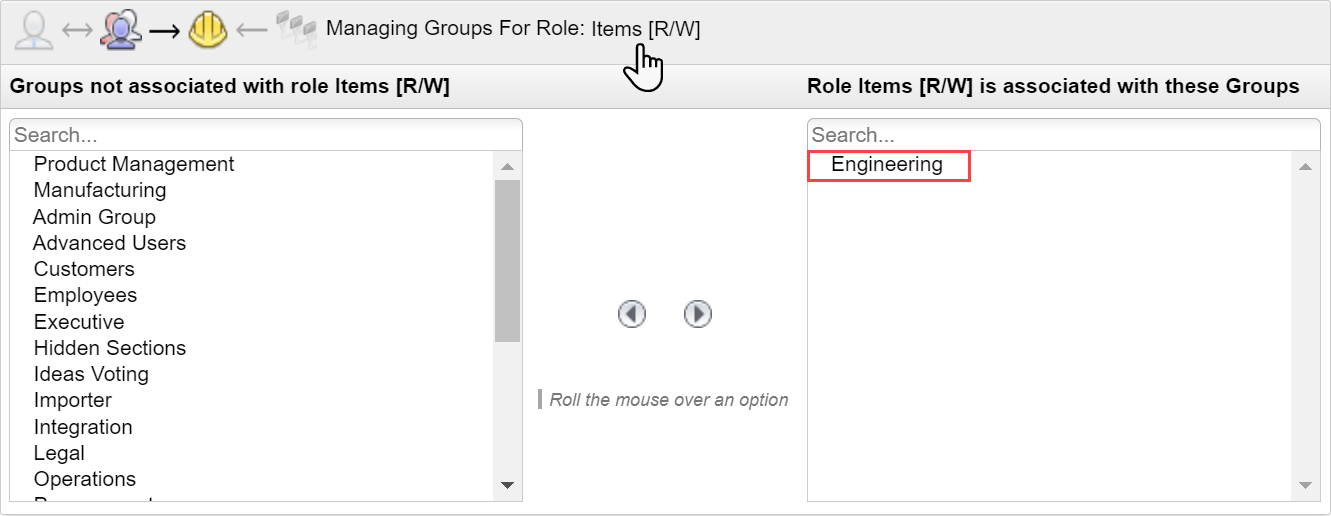
Find the appropriate role for your workspace and click on the Groups link
(e.g. ‘Items [R/W]’ to allow workflows performing read and write operations in the ‘Items’ workspace)Accociate the role with the “Engineering” group
Press Save
Attachments
The Fusion Manage workspaces must be configured to allow the user to work with items in the Attachments Tab.
To do this, they need the following permissions assigned: View Attachments, Download Attachments , Add Attachments and Edit Attachments.
Required for: Add-FLCAttachment, Save-FLCAttachment and Get-FLCItemAssociations when using -Attachments parameter
Bill of Materials
Relationships to workspaces which contain the according BOM line items must be configured for the Bill of Materials Tab:
In your Autodesk Fusion Manage site, click on Administration → Workspace Manager
For the affected workspace, click on Workspace Relationships
Make sure that one or multiple relationships exist for the “Bill of Materials Tab”
Press Save

Additionally the user must have the following permissions in the workspace: View BOM, Add to BOM, Edit BOM and Delete from BOM
Required for: Transfer Item BOMs workflow and all BOM cmdlets
Linked Items / Affected Items
The workspaces must be configured to allow relationships to the Affected Items Tab (in non-revisioning workspaces the tab serves as Linked Items tab):
In your Autodesk Fusion Manage site, click on Administration → Workspace Manager
For the affected workspace, click on Workspace Relationships
Make sure that one or multiple relationships exist for the “Managed Items Tab”
Press Save

Additionally the user must have the permission to View Managed Items in the according workspace
Required for: Change-Management workflow, Get-FLCItemAssociations and the Update-FLCItem -AffectedItems parameter
Workspace Behaviors
When integrating Vault with Fusion Manage, it is important to consider that scripts configured in Fusion Manage also execute when items are automatically created or updated by your Vault integration!
For the Transfer Item BOMs workflow, this script execution is even necessary to ensure all Vault data beeing processed correctly.
Units, dimension fields, and weights, for example, are calculated from the corresponding “PDM_” fields, which are mapped directly to Vault properties.
You can check which scripts are enabled - or temporarily disable them in case of problems - by performing the following steps for all workspaces that are configured in your workflows:
In your Autodesk Fusion Manage site, click on Administration → Workspace Manager
For all the configured workspaces, click on Behaviors
Verify the settings “Script to run at item creation” and “Script to run when item details are modified”.
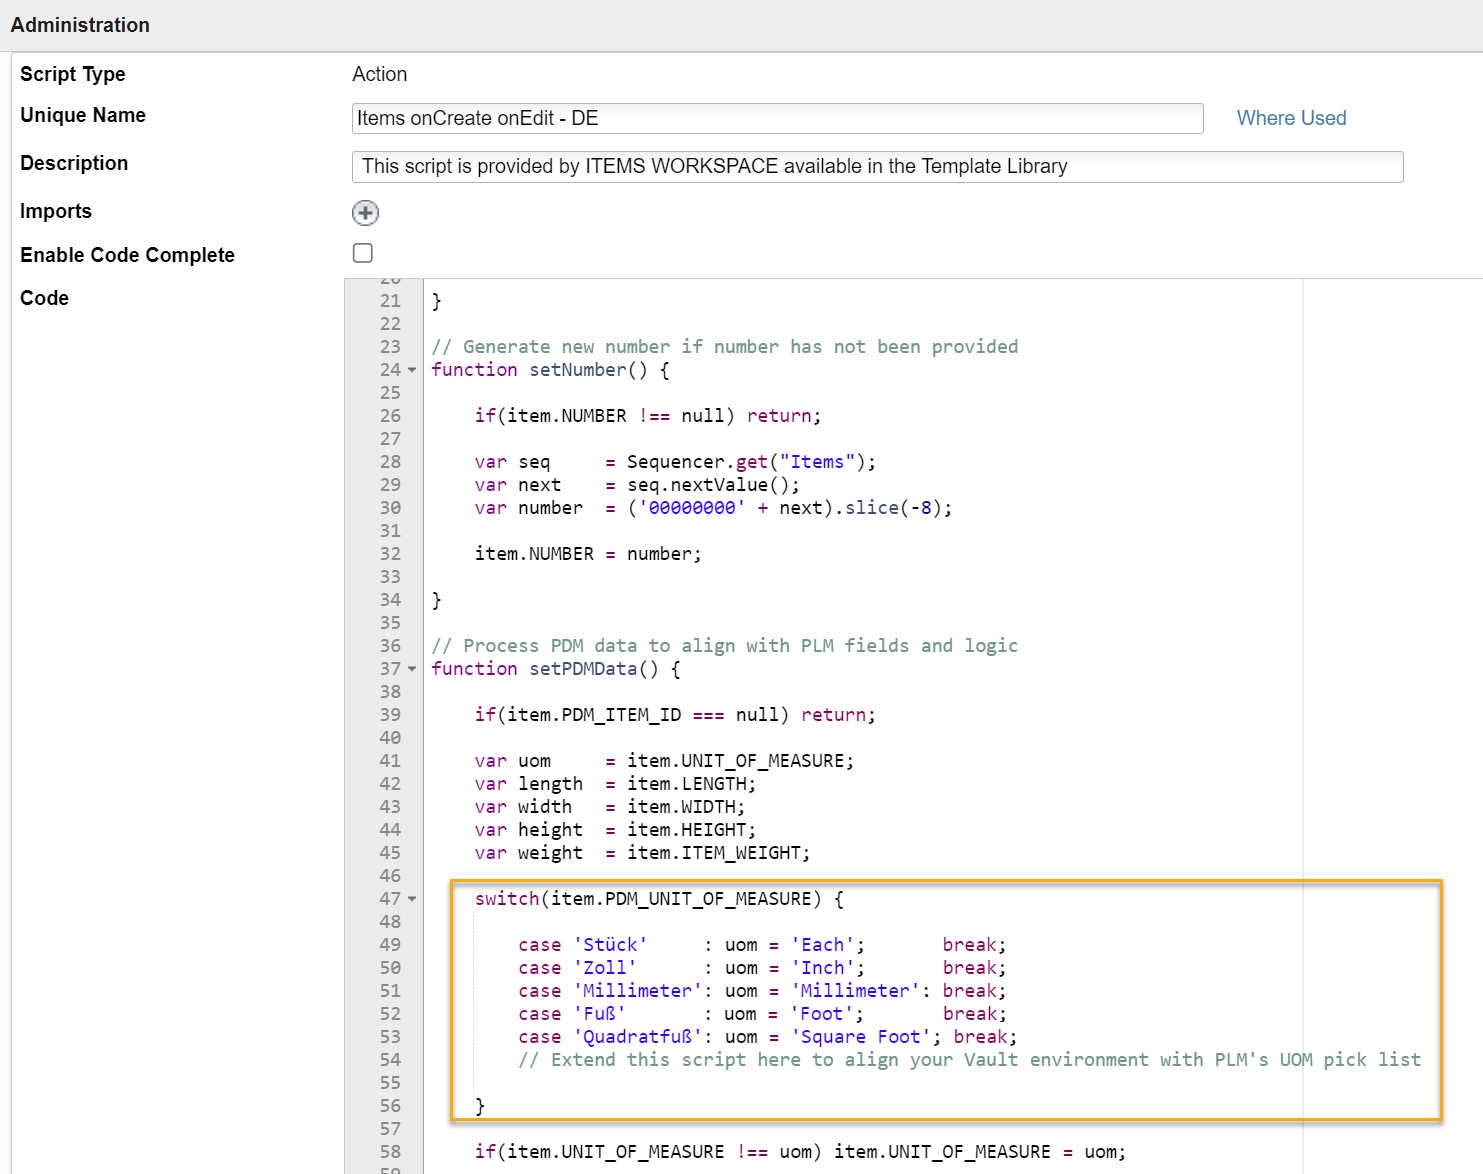
(e.g. for Autodesk’s default Items workspace the action ‘Items onCreate onEdit’ is required)Navigate to Administration -> System Configuration
Click on the Scripting link
Find the configured script and click on the Edit icon to check and adjust its logic.
(e.g. in the following ‘Items onCreate onEdit’ script, all your Vault Units must be specified so that a Unit of Measure is displayed in the Item Details tab)