Creating Job Scripts
Choose PowerShell IDE
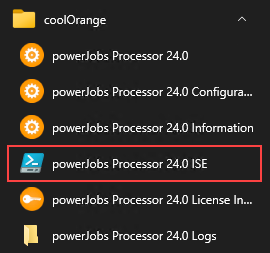
To get started with creating a custom job, open the PowerShell IDE or editor of choice. The powerJobs Processor ISE shortcut in the start menu can also be used which already opens one of our Sample Jobs.
Prepare PowerShell environment
During development it can be useful to be able to start the whole script or parts of it without having to run it on the job processor.
To achieve this, some important steps - which are performed automatically in the Job Processor - must be carried out manually:
A connection to Vault must be established with the Open-VaultConnection cmdlet so that the variables $vault, $vaultConnection and $vaultExplorerUtil variables available.
Now a test file or any other Vault entity can be retrieved and assigned to a variable just like the Setup_job.ps1 would do in the Job Processor.
For example set the $file variable to the first .idw file that is found in Vault:
$file = Get-VaultFile -Properties @{'File Extension'='idw'} #Search for a Drawing file
Any modules placed in the powerJobs modules directory are typically auto-imported as soon as the powerJobs module is used.
To make them available immediately, you can also manually import them by calling Import-Module powerJobs.
The variable $workingDirectory holds the path to a temporary directory (located in C:\Temp\powerJobs Processor...) where e.g. Vault files can be downloaded or file exports will be generated.
All the files which are created in this directory during the development phase, will be automatically cleaned up at the next job execution.
Alternatively, they can be removed at any time using the Clean-Up cmdlet.
Clean-Up -folder $workingDirectory
Choose from Sample Jobs
Our standard delivery comes with a couple of Sample Jobs that can be used as templates for new jobs.
Choose one of those job scripts and place a copy of the script in the %ALLUSERSPROFILE%\coolOrange\powerJobs\Jobs directory.
Give your new Job a meaningful name in the format YourCompanyName.SomeJobName.ps1.
If you prefer to do customizations, for example some sample jobs don’t allow all supported formats, the new script can be extend by adding the desired extensions like iam, ipt or ipn:
if( @("idw","dwg","iam","ipt","ipn") -notcontains $file._Extension ) {
	Write-Host "Files with extension: '$($file._Extension)' are not supported"
	return
}
An other example would be to changed the name of the exported target file.
In this example the according filename variable is extended with the revision number of the Vault source file:
$pdfFileName = "$($file._Name)_$($file._Revision).pdf"
Start from Scratch
Create a new script file with a meaningful name in the IDE and place it in %ALLUSERSPROFILE%\coolOrange\powerJobs\Jobs with the file extension .ps1.
In this example we are going to download the file, open it in the Inventor application and export it as PDF.
Download the file from Vault
We will use the Save-VaultFile cmdlet to download the file to our working directory.
$downloadedFiles = Save-VaultFile -File $file.'Full Path' -DownloadDirectory $workingDirectory
Open the file in Inventor
After downloading the file we will use the open-document cmdlet to open the file in Inventor.
$file = $downloadedFiles | select -First 1
Open-Document -LocalFile $file.LocalPath -Application 'Inventor'
Exporting the file
Now we can export the document as PDF, using the export-document cmdlet.
$pdfFileName = "$($file._Name).pdf"
Export-Document -Format 'PDF' -To "$workingDirectory/$pdfFileName"
Closing the opened file
Finally we close the file using the Close-Document cmdlet.
Close-Document
To run the job on the job processor see the Registered Jobs section and Queueing custom jobs.
If values in the job regularly change, it is also possible to declare settings in the job that can be easily modified in the powerJobs Settings Dialog user interface.