Jobs
powerJobs Processor extends the Vault Job Processor and allows the creation of custom job types in form of PowerShell scripts.
These Scripts and Modules are then executed in a prepared environment by the job processor when a job of that type is queued.
The PowerShell environment is partly prepared by the Setup_Job script which can also be customized.
These jobs can be used to perform various task.
Job Scripts
All Job scripts need to be valid PowerShell scripts with the file extension .ps1 that are stored in the directory %ProgramData%\coolOrange\powerJobs\Jobs
This directory contains a few Sample Jobs for most supported File Conversions using the provided Cmdlets.
New job scripts can be created or placed in the Jobs directory but they need to be registered before they can be executed by the job processor.
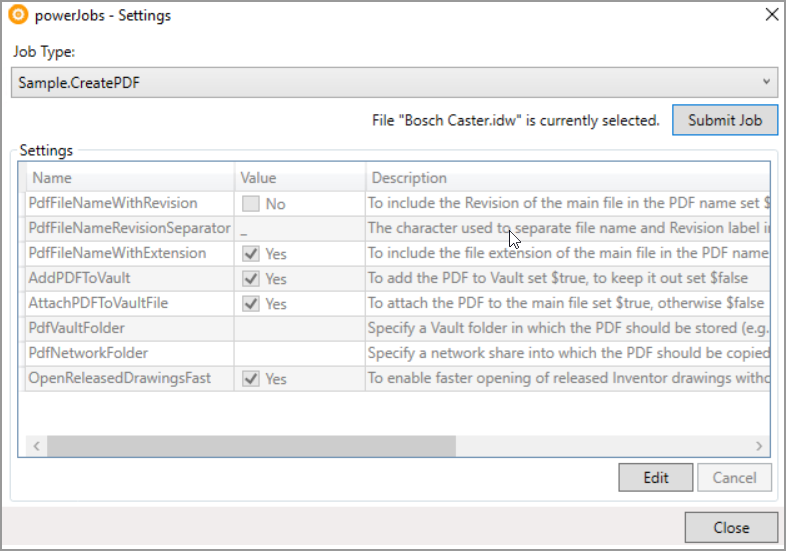
Job Settings
Each job script can contain a one section that declares settings for the job.
The beginning of this section is marked by #region Settings and the end by #endregion.
All the powershell variables which are declared in this region can be easily configured in the powerJobs Settings Dialog.
If values are declared for those, then these are the default values of the displayed settings.
They can simply be edited without powershell experience if they are declared with simple data types:
Switch settings are displayed for Boolean values like
$trueor$false.Text settings must be declared as single-line String variables. Their value must be enclosed in double quotation marks (
"...") or single quotation marks ('...').
Text strings which contain such quote characters are stored with second consecutive quote characters.
However, values can even be set to any other valid powershell expression.
A simple settings section could look like the following:
#region Settings
$pdfExportLocation = "C:\Exports\PDFs\"

$hidePDFinVault = $false

$pdfNetworkFolder
#endregion
In order to provide more detailed information about a setting, a powershell comment can be specified in the line before the variable declaration.
The description is displayed alongside the setting in the powerJobs Settings Dialog.
#region Settings

# Path to the directory the PDF files should be exported to
$pdfExportLocation = "C:\Exports\PDFs\"

# Wheter the PDF should be displayed in the Vault Explorer or not
$hidePDFinVault = $false

#endregion
More information on Creating custom Job Scripts.
Note
If changes are made to a script while the Job Processor is running, the changes will be recognized the next time the job is executed.
Modules
Module files need to be valid PowerShell script modules with the file extension .psm1. It is recommended to give the Modules a descriptive name, for instance myCompany.NetworkStorage.psm1.
All Module files are located in %ProgramData%\coolOrange\powerJobs\Modules and are automatically imported for jobs executed by the Job Processor and when the powerJobs module is imported.
Following modules are delivered with the product:
coolOrange.Applications.psm1
coolOrange.FileSystem.psm1
coolOrange.FileSystem
Contains functions to work with the computers FileSystem.
One important function is the Clean-up for cleaning up folders downloaded and generated files from your FileSystem after executing the job.
coolOrange.Applications
Contains functions to simplify the access to the Applications used by the powerJobs Processor.
These functions are just wrapping calls to the $Host.Applications object in order to use it in a more powerShell fashioned way e.g Get-Application.
Registered Job Types

Each Job Processor only handles jobs of specific types that are assigned to that instance. To see which types are enabled, open the “Job Types” dialog, which can be found in the “Administration” menu of the Job Processor.
The dialog displays all registered job types for this instance and whether they are processed or not.
To register a new job type the automatic synchronization of the Extended Job Processor UI can be used. Alternatively it is also possible to register the job type manually by extending the PowerJobs Processor.vcet.config file.
If there is an entry for a job type, but it is not checked, the Job Processor most likely cannot find the associated job script (.ps1 file) or it is not valid.
Warning
Adding or removing registered job types always requires restarting the Job Processor for the changes to apply.
Queueing Jobs
There are different options to queue custom job types.
For development purposes the powerJobs Settings Dialog can be used to queue a job manually.
To automate or assist workflows it is possible configure Vault to automatically queue jobs on Vault lifecycle changes.
Each single Vault lifecycle state transition must be extended with the according Job Type.
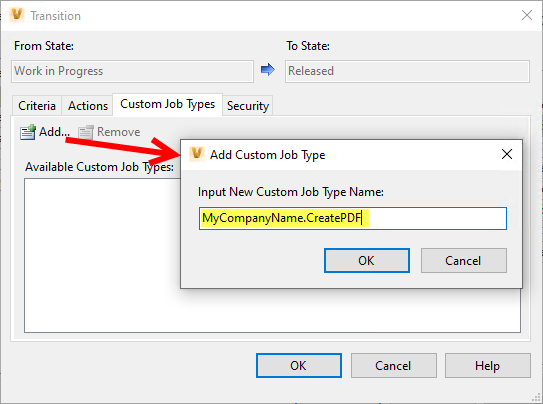
Afterwards when changing the state for a Vault File, Folder, Item or Custom Object, this will automatically queue the specified job.
For Change Orders jobs can be configured to be automatically queued when they reach the desired state, by using the Lifecycle Event Editor:
Get and extract the application from GitHub
Run the executable LifecycleEventEditor.exe
Login to Vault (a user with administrative privileges is recommended)
Navigate to the “Change Order” tab and select the default Workflow from the dropdown menu
Select the desired transition (e.g. Approved → Close)
Click on “Actions” → “Add Job to Transition” and add the job type without extension (e.g. “MyCompanyName.CreatePDF”)
Click on “Actions” → “Commit Changes” to save your actions and proceed then to close the application
Alternatively it is recommended to trigger jobs within a custom powerEvents script by using the Add-VaultJob cmdlet as the Priority of the created Job can be configured this way.
Jobs with higher priority will be executed first. The lower the number the higher the priority.
Register-VaultEvent -EventName UpdateFileStates_Post -Action {
	param($files, $successful)

	foreach($file in $files)
	{
		$job = Add-VaultJob -Name "MyCompanyName.CreatePDF" -Parameters @{"EntityId"=$file.Id;"EntityClassId"="FILE"} -Priority High
	}
}
Jobs can be triggered for Vault Files, Folders, Items, CustomObjects and ChangeOrders this way, by passing the required parameters.
Time triggered jobs can be configured so that they are executed in a specific Interval by creating a “{Job Name}.settings” file in the Jobs directory:
{
  "Trigger": {
    "TimeBased": "0 0 8 ? * MON,TUE,WED,THU,FRI *",
    "Vault": "Vault",
    "Priority": 10,
    "Description": "This job is triggered weekdays at 8:00 am"
  }
}
It is also possible to configure the job Priority within this settings file.
Errors
In job scripts powershell’s throw keyword should be used to raise exceptions manually and they can be handled with try/catch blocks:
try{
$files = $vaultConnection.FileManager.AcquireFiles($settings)
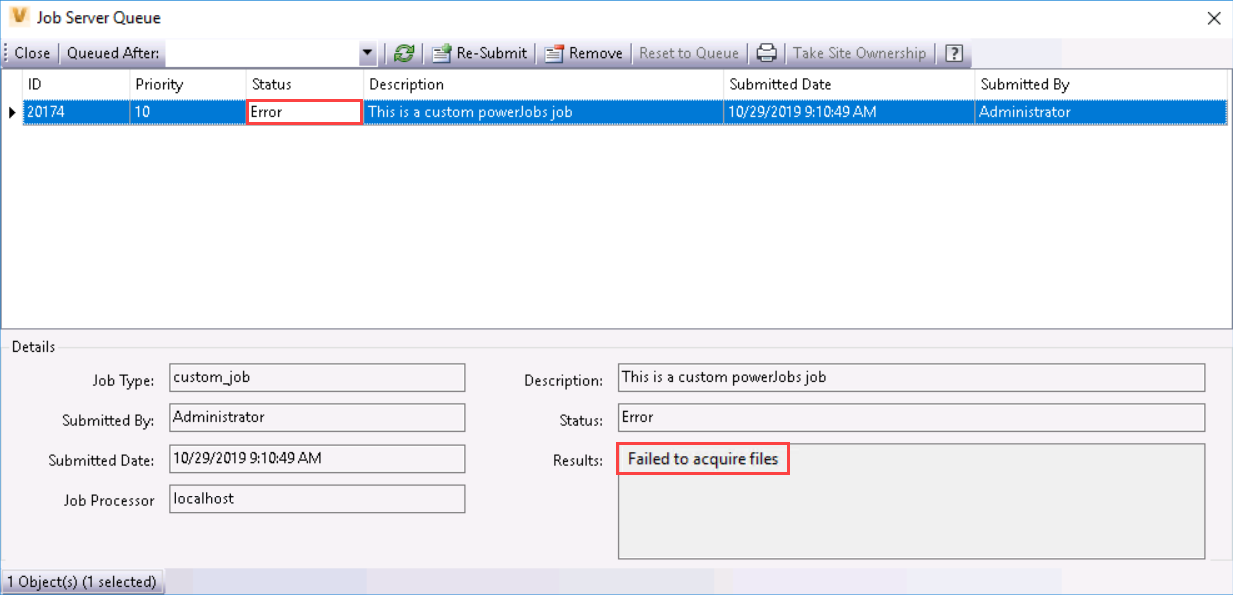
} catch{
throw("Failed to acquire files")
}
By default the script execution will terminate, because the $ErrorActionPreference variable is set to ‘Stop’.
In order to change the PowerShell error handling behavior for all jobs globally, the variable can be changed in the Setup_Job.ps1 script.
When an exception is thrown within a job script, the job is marked with the status Failure in the Job Queue.
The exception messages can be found directly in the Result of the failed jobs.
Exception details of the failed job are displayed in Trace Window.
Additionally more detailed information about all the Warnings and Errors that where logged during the job execution can be found in there or in the logfile.