Job Configuration
powerJobs Processor extends the Vault Client to display and edit PowerJobs Processor Job Settings directly in the Vault Client and allow queueing jobs for specific entities to test the configuration.
powerJobs Settings Dialog
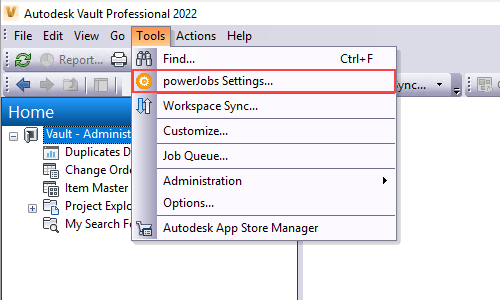
The powerJobs Settings Dialog can be opened via the Tools → powerJobs Settings… menu entry in the Vault Client.
The dialog displays the settings of all the jobs in the jobs directory on the current Job Processor machine.
Newly created jobs in the jobs directory are display with their settings as soon as the dialog is closed and re-opened.
When a Vault entity (File, Item, Folder, Change Order or Custom Object) is selected in the Vault Client and the powerJobs Settings Dialog is opened, a job of the selected job type can be submitted for testing purposes.
Job Settings
The Dialog displays the Settings for the selected job type. The job type can be changed by clicking the arrow on the right and selecting a different entry.
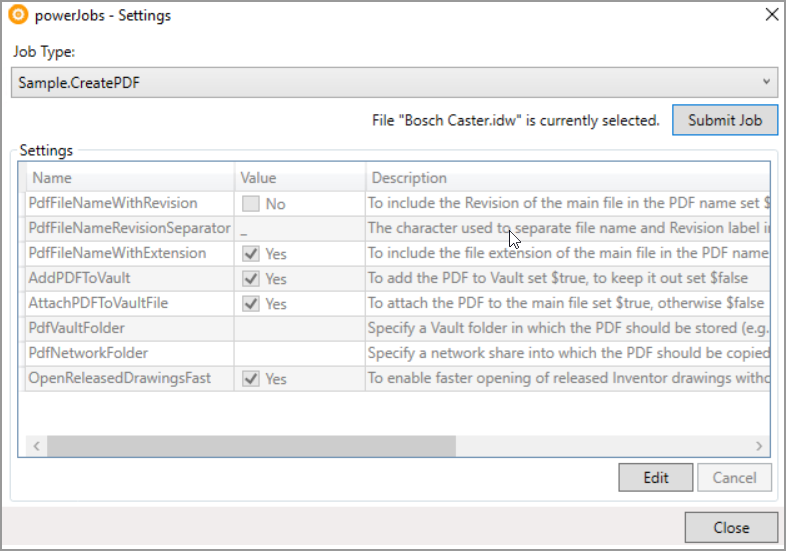
When a job is selected that declares Settings, the table displays the following information for each declares option:
Name
Settings current Value
Description
Editing Settings
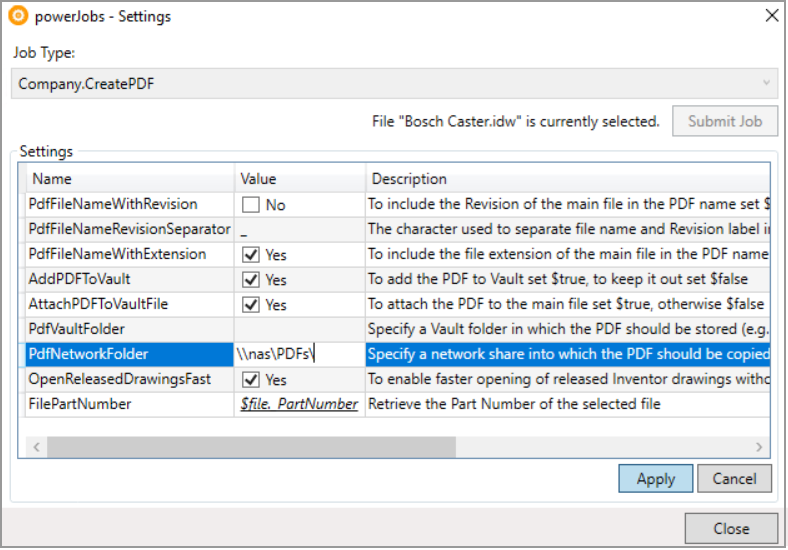
The values of settings can be edited by selecting a job from the dropdown list and clicking the Edit button.
After clicking the button, the Value column of becomes editable.
Values are displayed based on the type of the underlying powershell variables:
Switch settings allow to enable or disable particular job settings by clicking the Checkbox.
Text settings allow to specify setting values as string contents.
Powershell settings allow experienced users to specify settings as Powershell syntax which are evaluated as the job runs. Powershell settings are highlighted as underlined and italic in the dialog.
Warning
Multi-Line Text settings are currently not supported by the powerJobs Settings Dialog!
This includes also setting specifications in the form of powershell line-feeds (`r`n, `n).
While the settings are edited, the job type can not be changed and jobs can not be submitted using the Submit Job button.
The settings must either be saved using the Apply button or discarded with the Cancel button.
Pressing Apply writes the values verbatim to the settings section in the Job.
The Cancel button discards the current changes and revert all values back to the original values.
Queueing Jobs
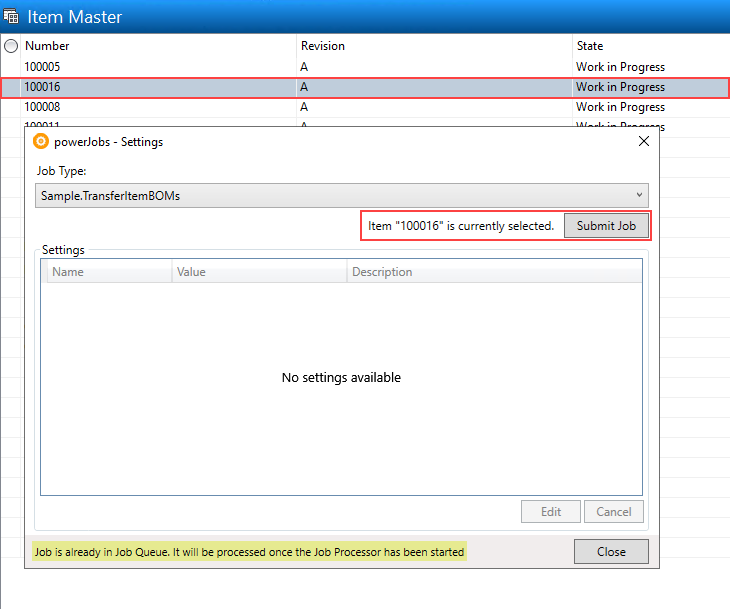
The Submit Job button adds a job of the selected type to the Job Queue for the currently selected entity in the Vault Client.
The job will be triggered for the exact version of the selected Vault entity.
The status bar then provides information on whether the job was successfully queued.
Jobs that are added to the Job Queue using the powerJobs Settings Dialog are queued with entity specific parameters such as the EnitiyId and EntityType of the selected elements and are queued with priority 1 which is the highest job priority.
The powerJobs Settings Dialog supports triggering jobs for Files, Items, Folders, Change Orders and Custom Objects.
The following parameters are passed to the Job:
EntityIdEntityClassId(with value “FILE” for Files, etc.)
These parameters are used in the Setup Job script to automatically create the Powershell representation of the entity ($File, $Folder, Item, Changeorder, Customobject).
Enabling Job Queue
When the Settings Dialog is opened and a Vault User with enough permissions is signed into Vault, a check is performed whether the Job Queue is enabled on the current Vault Server and it tries to enable it in case it is disabled.
The following Vault permissions are required to perform theses actions:
Vault Get Options to check if the Job Queue is enabled
Vault Set Options to enable the Job Queue on the Vault Server