Sample.TransferERPBOMViaFileTab
The “ERP BOM” tab from this sample script allows the designer to select a file in the Vault Client and immediately see if a BOM already exists in the ERP system.
If it does, all the position numbers, material numbers, quantities, and other relevant BOM row details are displayed live from the ERP system.
Using the BOM Window it is possible to automatically generate and update all required materials and BOMs in the ERP system.
Requirements
The event script is designed to be used with the “BomService” and “MaterialService” from the Demo ERP system:
an internet connection is required and the domain ‘demo.powergate.online’ needs to be accessible on TCP port 80.
Vault files are uniquely assigned to an ERP BOM via their material number stored in the Vault property “Part Number” and the ERP field “ParentNumber”.
Individual BOM rows are also identified by the material number, but their position in the CAD BOM and the ERP BOM “Position” must also match.
This tab can also be actived at any time when a custom ERP intergration is available.
However, please note that this may cause errors due to entityset-conflicts with the Sample.ConnectToPowerGateServer script which should be disabled (entity sets “Boms”, “BomItems”, “Materials” and “MaterialDescriptions” are used).
The possible values for “Type” and “Unit of Measure” are retrieved from the Tab configuration that got uploaded to the Vault Server using the Tools Menu items provided by Sample.SyncERPTabConfiguration.
If no configuration has been uploaded yet, a default configuration is uploaded the first time you log in to Vault.
Testing
The script can be tested by doing the following steps on your test-environment:
Open the Vault Client and log in to your Vault
Navigate to a file and select it
Click on the tab with the name “ERP BOM”, which will automatically connect to the Demo ERP system
Since no BOM with the “Part Number” of the selected file exists in the Demo ERP system, a new one can be created.
To do this, click on “Transfer BOM to ERP”: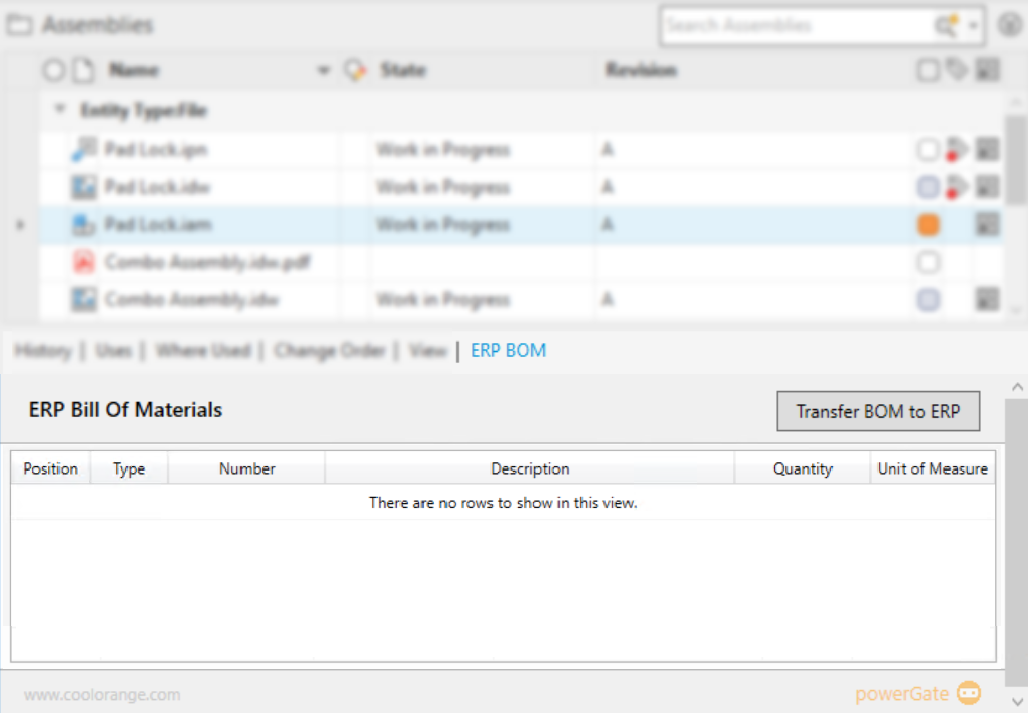
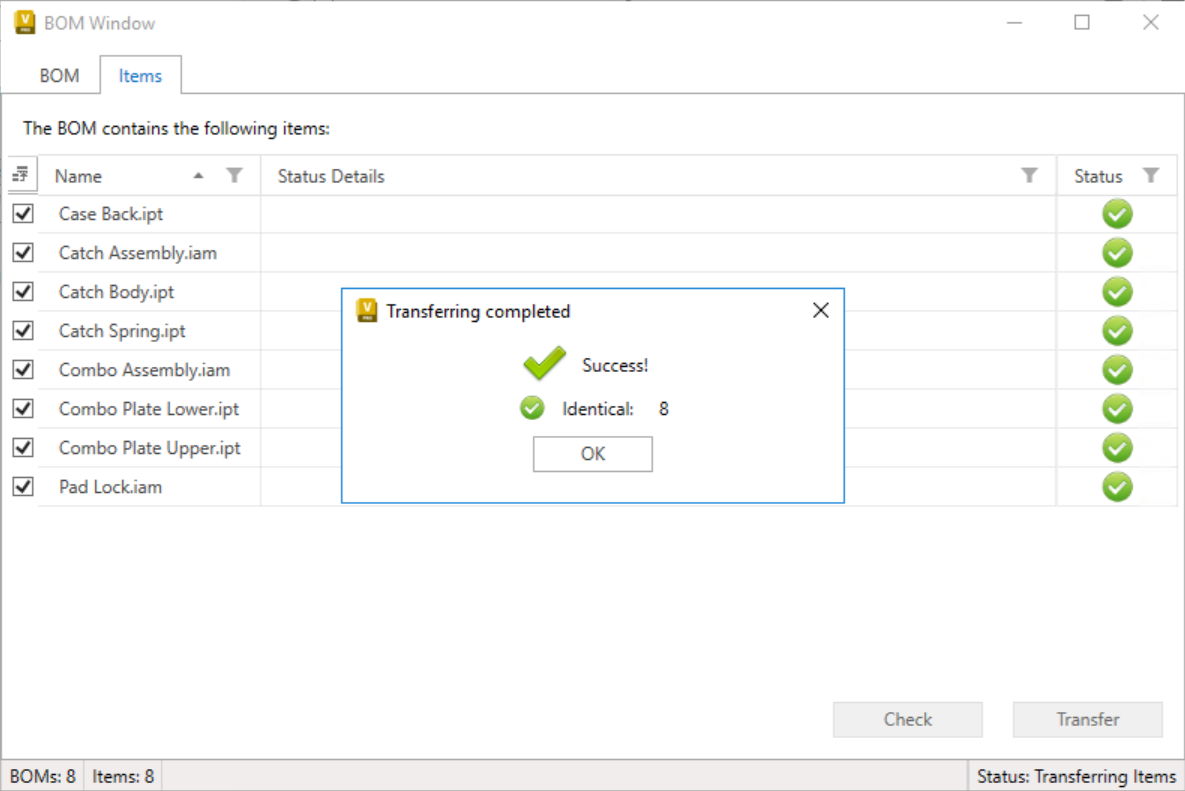
The BOM Window opens and the complete CAD-BOM is displayed.
Use the respective Check- and Transfer buttons in the “Items” tab to first create or update all the required Items in ERP
Click the Check- and Transfer buttons in the “BOM” tab.
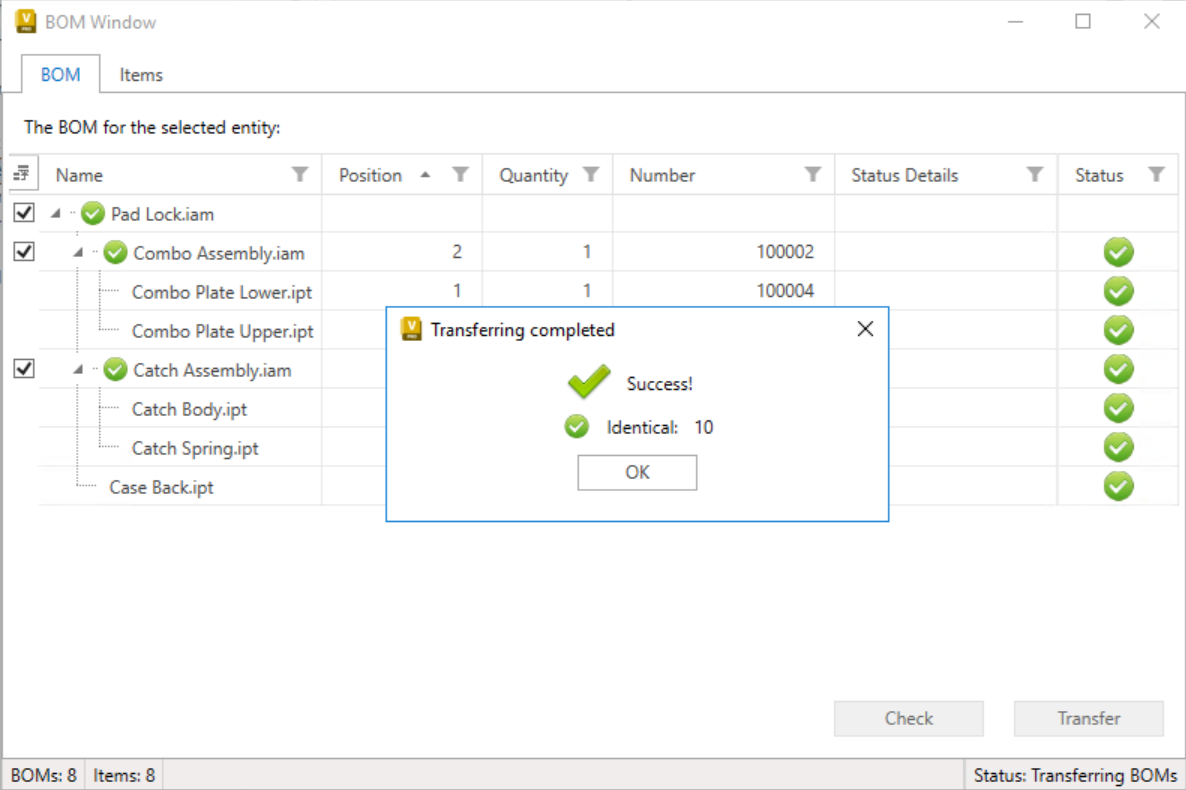
The BOMs have now been successfully generated in the ERP system and the BOM Window can be closed.
The position number, material number, quantity, and other relevant information are displayed for all rows in the newly created ERP BOM:

Disabling the script
By default, the script enables the Vault “ERP BOM” tab for files.
If you work exclusively with Vault Items, or if you do not use this tab, the file %PROGRAMDATA%\coolOrange\powerEvents\Events\Sample.TransferERPBOMViaFileTab.ps1 can be moved to the directory %PROGRAMDATA%\coolOrange\powerEvents\Events\Disabled.