Client Customizations
As an add-in for Vault Client and CAD applications, powerEvents enables easy and powerful customization of Vault functionality with additional workflows, guardrails, automations, tabs, and more.
This is achieved through PowerShell scripts and modules that are executed in every Vault application.
The directory containing these customizations can be opened using the powerEvents Configuration shortcut on the desktop or in the Start Menu.
Scripts
All PowerShell scripts, which should be executed automatically when Vault applications are launched, must be placed in the %PROGRAMDATA%\coolOrange\Client Customizations directory.
This directory contains scripts that ensure all settings in the powerJobs Settings Dialog for submitting jobs, also take effect on the workstations:
In addition the directory consists of two sample scripts, both starting with the name ‘Sample.’. They are disabled by default and are therefore located in a subdirectory named ‘Disabled’:
Their purpose is to demonstrate possible automation processes when working with the Vault Client and to help you get started creating your own scripts.
The goal of all these customization scripts is to cover some common workflows and be easy to configure.
Enable or Disable scripts
The modular structure of scripts allows to easily disable or active individual customizations.
To do this, the corresponding script can simply be moved to the %PROGRAMDATA%\coolOrange\Client Customizations\Disabled directory to turn it off, or back to the Client Customizations folder to re-enable it.
Scripts placed in the Disabled folder remain disabled after product updates.
Create or edit scripts
When creating your own client customization, it is recommended to copy a sample script and modify it to your needs.
It is not necessary to restart the application, because all customizations (scripts and modules) are automatically reloaded by default when a change is detected.
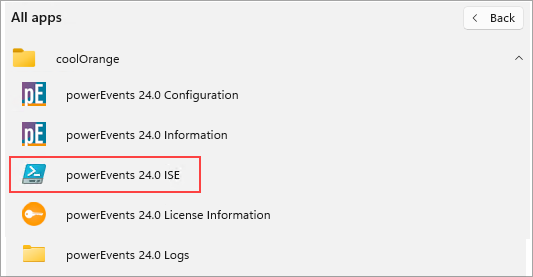
In order to get started with creating your own script either open any PowerShell IDE or the powerEvents ISE shortcut in the start menu, which already opens one of the sample scripts.
The powerEvents module can be imported with Import-Module powerEvents.
Keep in mind, that code in the scripts is executed while the Vault application is launched, and thus no Vault connection is available.
A Vault connection (required for powerVault Cmdlets) is only available during the execution of a registered Vault event, in Vault tab actions, or when you click buttons in the Vault Client menu or Inventor ribbon.
Therefore, the use of most powerVault Cmdlets is possible only in such -Action script blocks or functions.
Debug scripts
As mentioned above, individual customization scripts can be debugged in Windows PowerShell ISE by pressing F5.
But it is also possible to attach the debugger to a running Vault Client or CAD application.
In this example, Windows PowerShell ISE is used because it is available by default and can debug both Windows PowerShell 5.1 and PowerShell 7 runspaces, covering all supported Inventor and Vault Client versions.
However, the informations are also helpful if you prefer to use other IDEs such as Visual Studio Code.
In the Console Pane, run the following commands to attach to a running Vault Client process:
Enter-PSHostProcess -Name 'Connectivity.Vault*' # run Get-PSHostProcessInfo to list all processes that host PowerShell, e.g. 'Connectivity.VaultPro', 'Inventor', 'acad' ...
Debug-Runspace -Name 'coolOrange'
For subsequent script executions, the debugger stops automatically in the according customisation script. Note: After the execution, however, the debugger is detached and must be readded to pause in additional executions (STRG+C and repeat Debug-Runspace).
Alternatively, by adding the following line in a problematic script area, the debugger pauses exactly there as soon as this change is reloaded:
if([System.Management.Automation.Runspaces.Runspace]::DefaultRunSpace.Debugger.IsActive) { Wait-Debugger }
Debugging can then be continued in single-step mode (F11) or new breakpoints (F9) can be reached after continuing script execution (F5), allowing to inspect the values of current variables.
Modules
PowerEvents is delivered with module scripts which are installed in the powerEvents module directory %ProgramData%\coolOrange\Client Customizations\Modules.
The Common.psm1 module provides the $processName variable which is available in all customization scripts.
This variable returns the name of the process in which the script is currently executed.
The global flag $powerEvents_ReloadPsScripts can be used to disable the automatic script reloading:
$global:powerEvents_ReloadPsScripts = $false
The JobTriggerSettings.psm1 modules provides functions required in the SubmitJobsOnLifecycleTransition.ps1 and SubmitJobsOnVaultMenuItemClick.ps1 scripts.
The IsSheetMetalPart() function can be used to check whether a file is sheet metal part. In order for the function to check this, at least one of the following two Inventor iProperties must to be mapped to a Vault property:
‘Document SubType Name’
‘Document SubType’
The respective Vault Configuration sections describe in detail how the Inventor iProperties should be mapped in Vault.
Errors
powerEvents notifies the Vault user about Terminating Errors that occur during application startup, when executing customization Scripts and Modules.
In this case the configured processes might not be executed successfully, because of missing Vault event registrations.
Even if the execution of one script fails, this has no effect on other scripts as they are executed independently.
In order to raise exceptions manually you can use Powershell’s throw keyword and you can handle them by using try/catch blocks:
Register-VaultEvent -EventName EditItems_Pre -Action {
	try {
	        $vault.ItemService.EditItems($null)
	}
	catch {
	        throw "A null value was passed in where a null value is not allowed (Vault error code: 155)."
	}
}
Also if a registered Vault event is raised, and only then an exception occurs within the action (as in the previous example), an Error Message Box will be shown.
Details of the failed event execution are displayed directly after the PowerShell execution terminates:
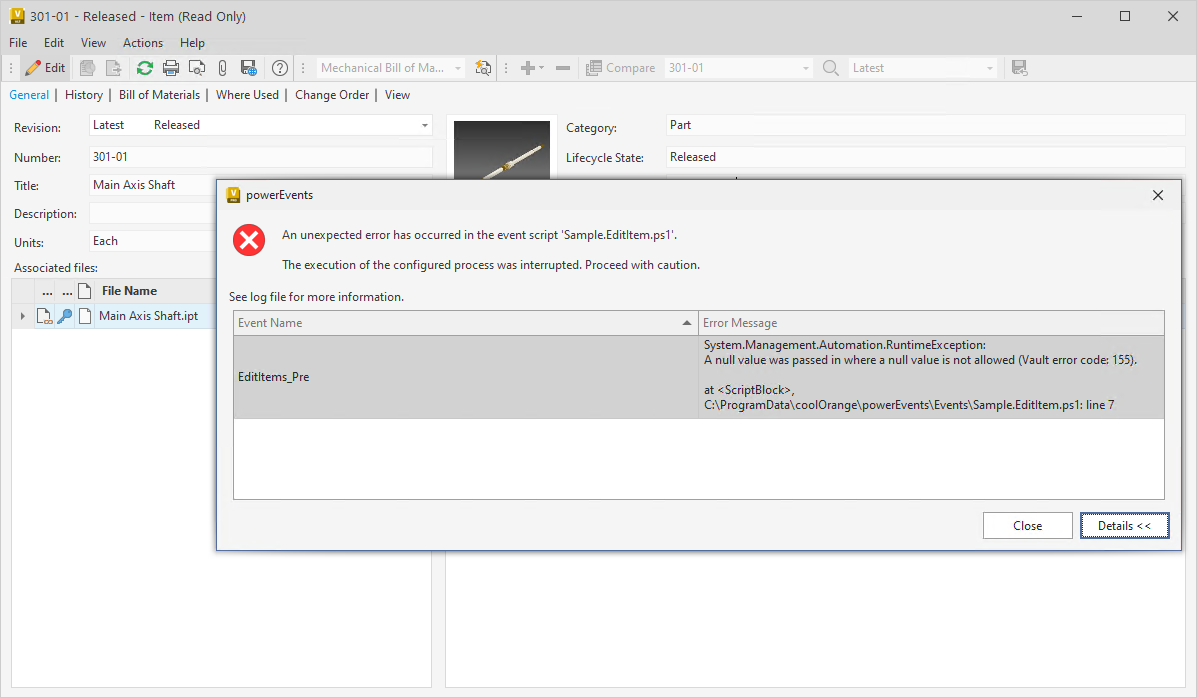
This happens every time an event is triggered by a Vault API method and has no effect on any other registered Vault events as they will still be executed.
The same details and all the Warnings and Errors that where logged during the script execution can be found in the logfile.
Note that PowerShell executions continue for Non-Terminating Errors by default.
For changing this error handling behavior globally, the variable $ErrorActionPreference can be changed to ‘Stop’ in order to terminate the script execution even for such errors:
$ErrorActionPreference = "Stop"
In case a Vault operation aborts because a Vault Server Error Code was returned the according Post event can make use of the $successful variable in order to check if the underlying Vault Web Service call was successful or not.
Register-VaultEvent -EventName EditItems_Post -Action {
	param( $items, $successful)

	if(-not $successful) {
	        return
	}
	#...
}
Distribution
Once the local client customisations have been successfully tested, they can be easily shared to other Vault workstations by installing the coolOrange Customization Server on the Autodesk Data Management Server and powerEvents on all workstations.
Then simply run the script Publish-Customizations.ps1 in the directory C:\ProgramData\coolOrange, which publishes all these scripts and modules for this Vault Server.
From this point on, your client customizations are automatically downloaded to all workstations as soon as the Vault Client or any other application that connects to the Vault Server is launched.
Note
If you have published your customer key, the customerkey.lic file is automatically distributed along with the customizations themselves.
This enables all products included in your subscription to be activated automatically on all newly installed workstations.
The distribution mechanism is based on the popular version control system Git, but does not require a git installation.
Simplified functions for publishing and synchronizing customizations are even designed to help Git-experienced scripting guys.
Publish Customizations:
By running the Publish-Customizations script, the local C:\ProgramData\coolOrange directory is automatically linked to the Git repository http://{Your_Vault_Server}/customizations/coolOrange.git.
By default, the Vault Server against which the current customizations were tested is used, meaning the currently (or lastly) connected Vault Server.
To directly publish from any PowerShell IDE, the following command can be used:
Import-Module powerEvents

Publish-Customizations

# OR to use a specific Server instead of the lastly connected ADMS or the currently connected 'Open-VaultConnect -Server' (e.g. for automations where the Vault Client has perhaps never been logged on to a server before):
Publish-Customizations -Server {Your_Vault_Server}
Note that only files located in the directory %PROGRAMDATA%\coolOrange\Client Customizations are published (including the customerkey.lic file, if available). Other product directories, such as Jobs, are ignored.
After distribution, each Vault application launch informs about changes that may still need to be published.
This way, local fixes or improvements to client customizations can be easily distributed from any Vault environment by running the publishing script.
Also if newer script or module versions have already been published by teammates, it helps to ensure that these are retrieved without changes being lost or accidentally overwritten. If conflicts occur, they have to be resolved and tested before the changes can be re-published.
Git tools and Visual Studio Code integrations offer excellent support here in particular.
After executing the Publish-Customizations script once, all the necessary settings are made (a .git folder is created) to use all these tools seamlessly.
Synchronizing Customizations:
During the start of Vault applications, all local scripts and modules are updated to the latest version available on the connected Vault Server.
The synchronised changes will then take effect immediately and are therefore used even if the coolOrange Customization Server would become unavailable for some reason.
In the case such distribution problems occur, Vault users immediately recognise an Error Message Box with additional details, that help in resolving the issue effectively.
The synchronization also allows published customizations to be automatically distributed to new workstations simply by installing powerEvents.
Right at the first Vault start, all default-installed sample scripts and modules (as well as the standard scripts for powerJobs Client), will be replaced with your published customizations.
Please also see our update notes for further details.
Warning
Please do not uninstall the coolOrange Customization Server on the Autodesk Data Management Server, for example, after a project Go-Live.
All Vault environments that have retrieved client customization from that Vault Server in the past, would warn the Vault users about the failing distribution!
Stopping a synchronization is only possible by removing the C:\ProgramData\coolOrange\.git directory on all workstations.