Getting started
Once the CustomizationServer is installed on the Autodesk Data Management Server, the system is ready to distribute customizations effortlessly.
No additional configuration is required to initiate the process.
Publish customizations easily
Your files only need to be uploaded to its repository so that they will be automatically distributed to all workstations connected to the Vault Server.
Regardless of whether the machines are running or turned off, or if new environments are added over time, the customizations are then synchronized every time a Vault application is launched.
This ensures that all Vault applications in your organization always use up-to-date customizations.
Currently, the distribution exclusively supports the distribution of customizations for Vault Client and CAD applications.
These include:
powerEvents workflows, guardrails, automations, tabs and other enhancements
powerJobs Client standard scripts
powerGate ERP Integrations
Starting from v25 product versions, the respective coolOrange products are , if a customer key is also distributed.
The corresponding products only need to be installed in order to publish.
Limitations
Please note that distribution is limited to the customizations and products mentioned above.
Customizations for other products are not yet supported for automatic distribution.
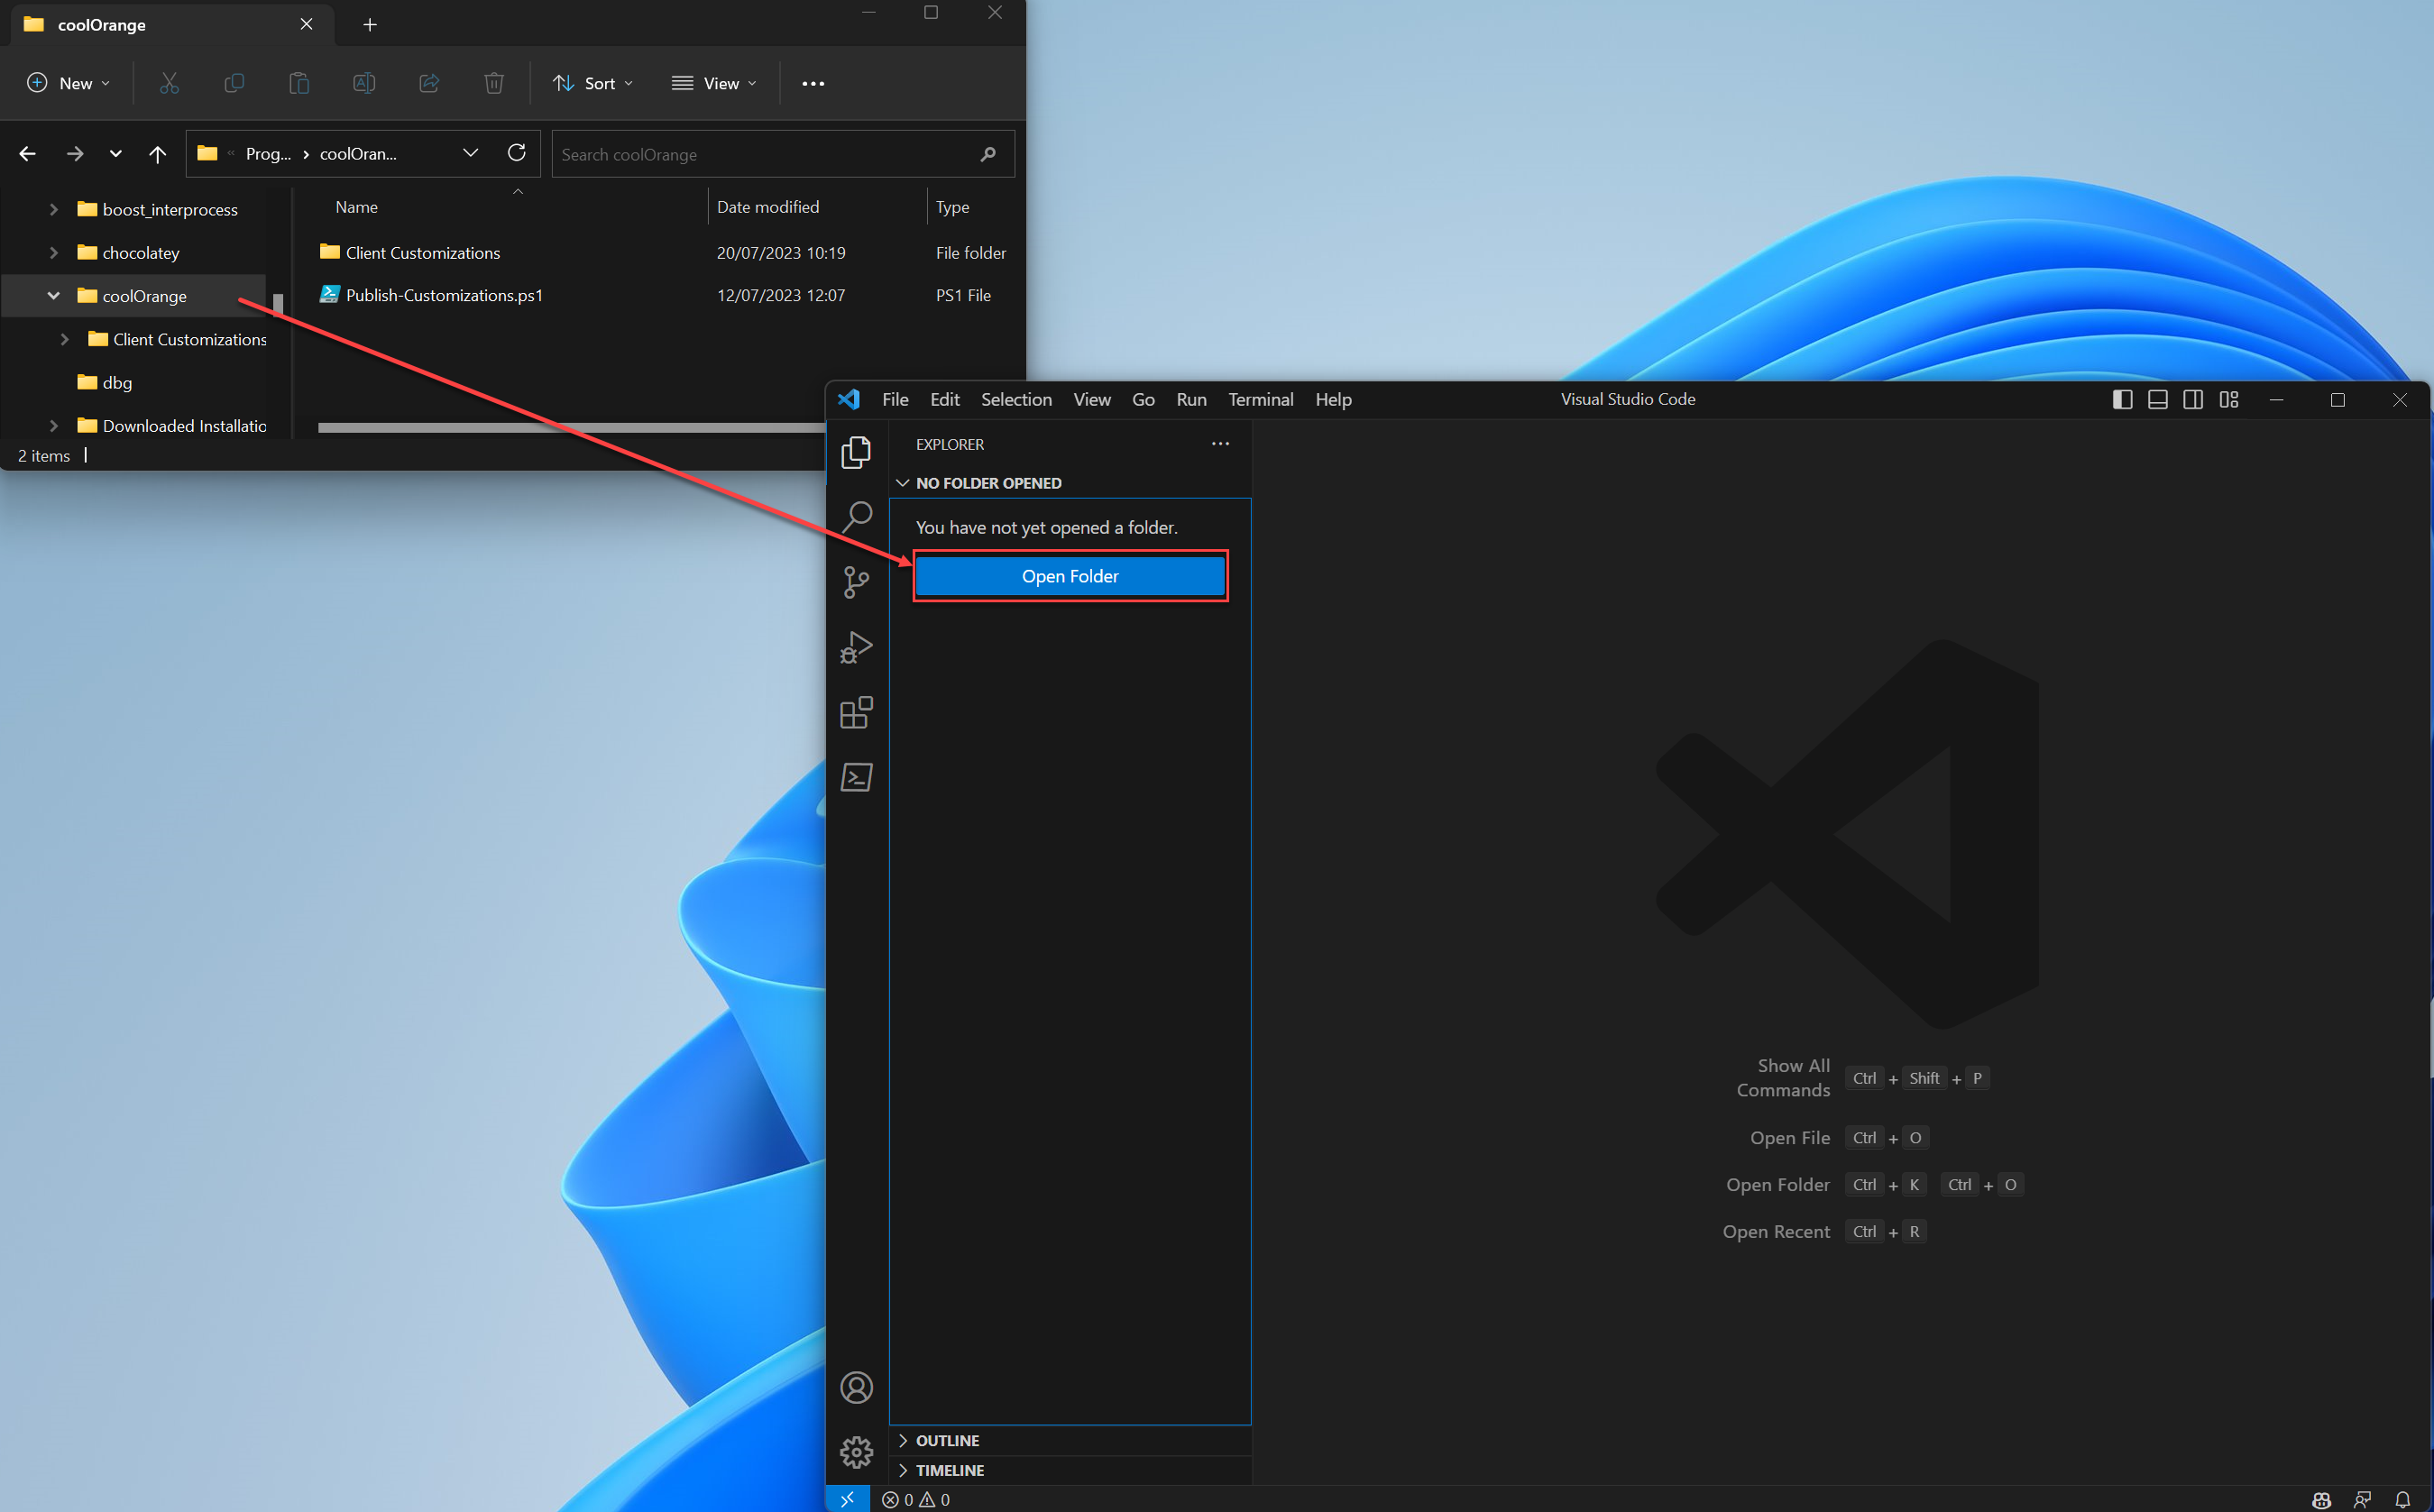
All their customization files are located in the directory C:\ProgramData\coolOrange\Client Customizations.
After they have been tested on your environment, the easiest way to publish them is to use the Publish-Customizations script.
It requires no Git installation or knowledge and all the steps described below are set up for you.
Publish using Git or Visual Studio Code
Git experts already have a Git client installed on their development environment.
Especially when several team members work on the same customizations on different computers and publis fixes or enhancements, tools like Visual Studio Code can be very helpful in resolving possible conflicts.
To publish the local files which are already located in the C:\ProgramData\coolOrange directory, after installing the CustomizationServer on the Vault Server either:
run the Publish-Customizations script for the very first publication (recommended)
or restart the Vault application and logon to your Vault Server
In both situations, the local directory is automatically linked to the Git repository http://{Your_Vault_Server}/customizations/coolOrange.git.
From this point on, an additional remote was set up in the local git repository, which now points to the respective Vault Server.
In the following example, our C:\ProgramData\coolOrange directory is even already managed in another Git repository (cloned from GitHub).
To see a list of all remotes (e.g. if multiple ADMS servers are used) simply use the following command:
git remote -v

#origin  https://github.com/coolOrangeLabs/powerGateErpIntegration.git (fetch)
#origin  https://github.com/coolOrangeLabs/powerGateErpIntegration.git (push)
#localhost       http://localhost/customizations/coolOrange.git (fetch)        <-- New
#localhost       http://localhost/customizations/coolOrange.git (push)         <-- New
Master branch
Since we want to continue publishing here without the Publish-Customizations script, please note that we will work on a “master” branch (not main) for simplicity.
You can continue by renaming the main branch to master using this command:
git branch -m master
All customization files in the local master branch are committed with a meaningful commit message and pushed to GitHub (our origin):
git add "Client Customizations"
git commit -m "added two new workflows for the Vault Client and Inventor"
git push origin master
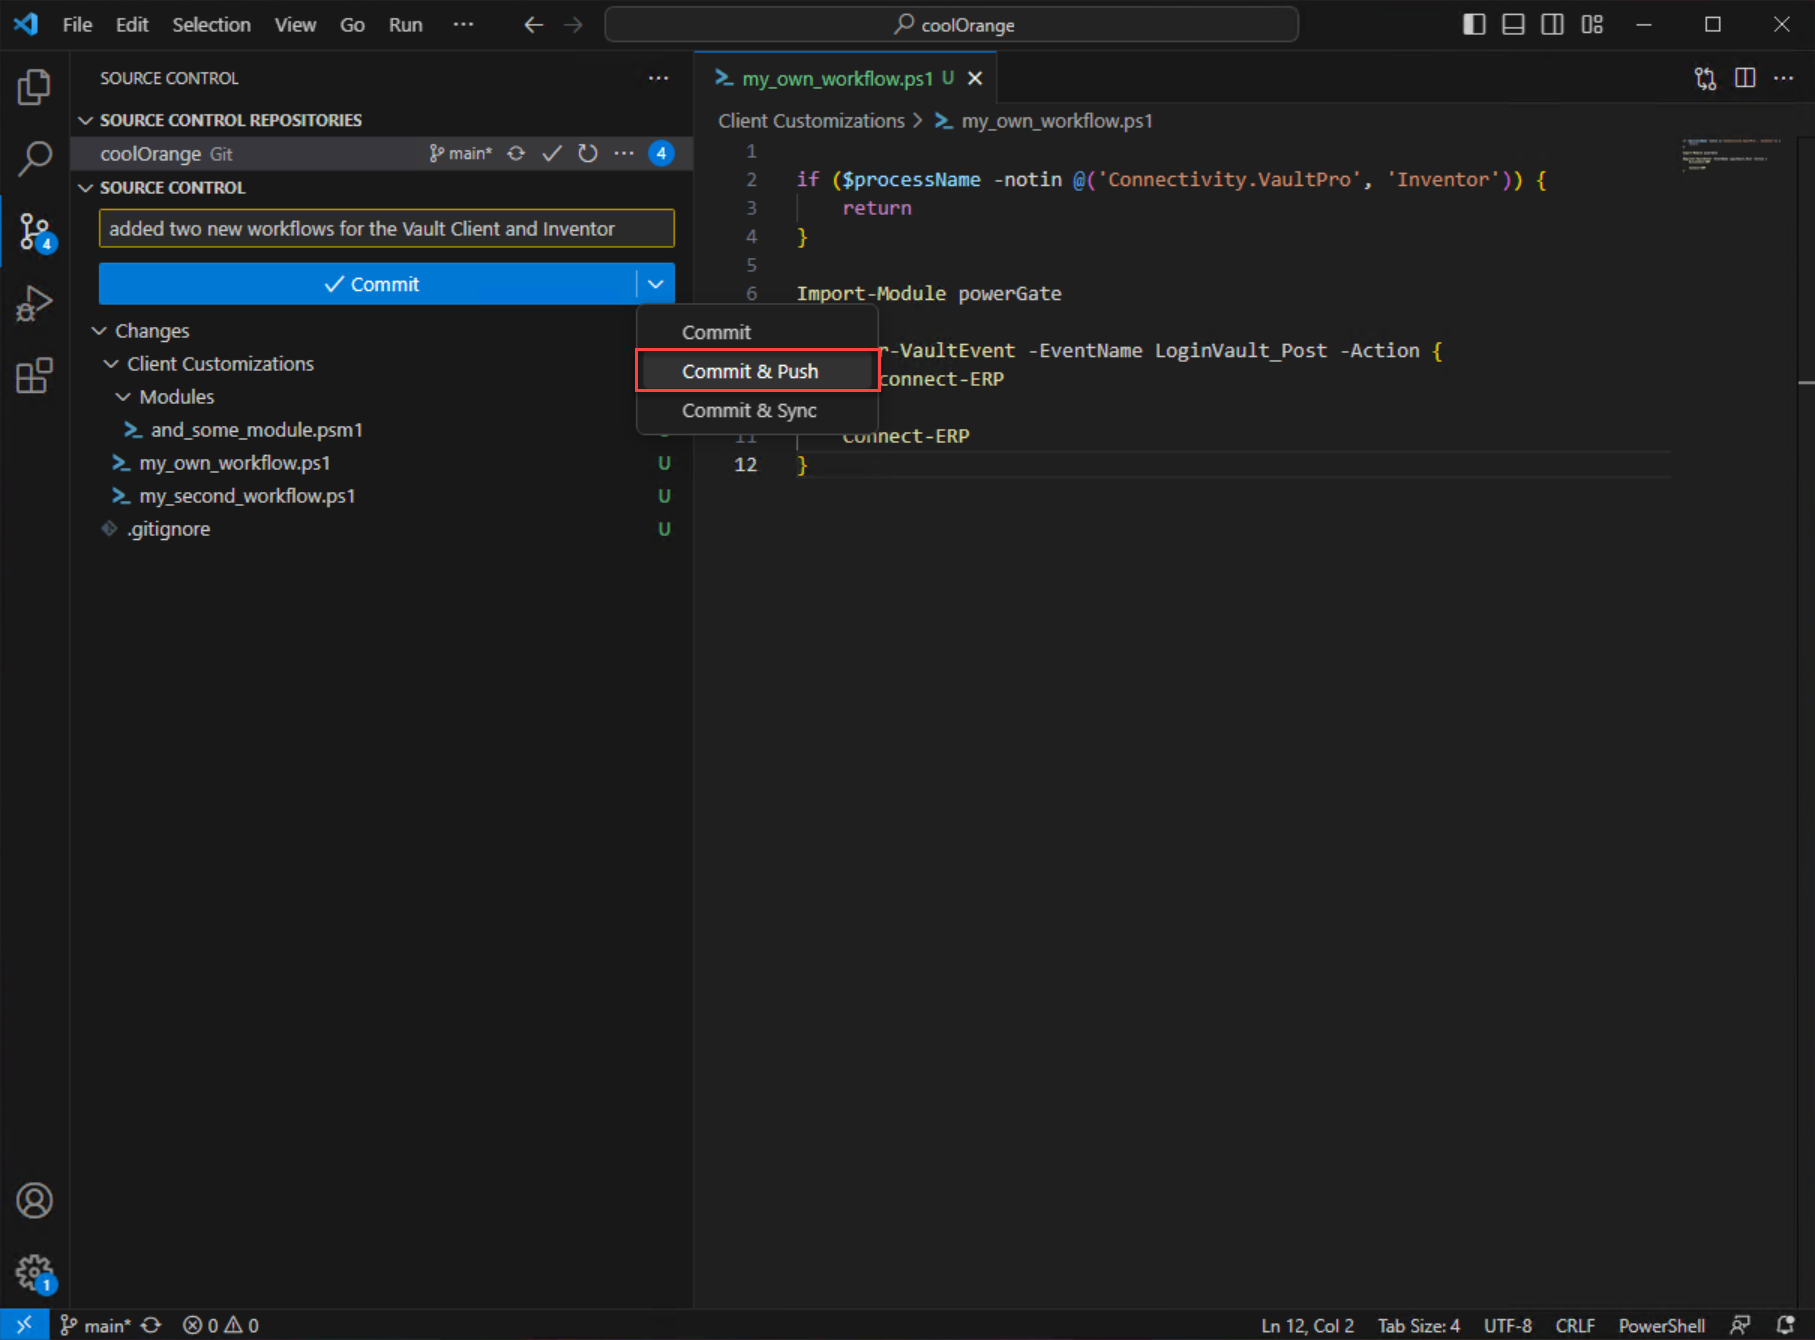
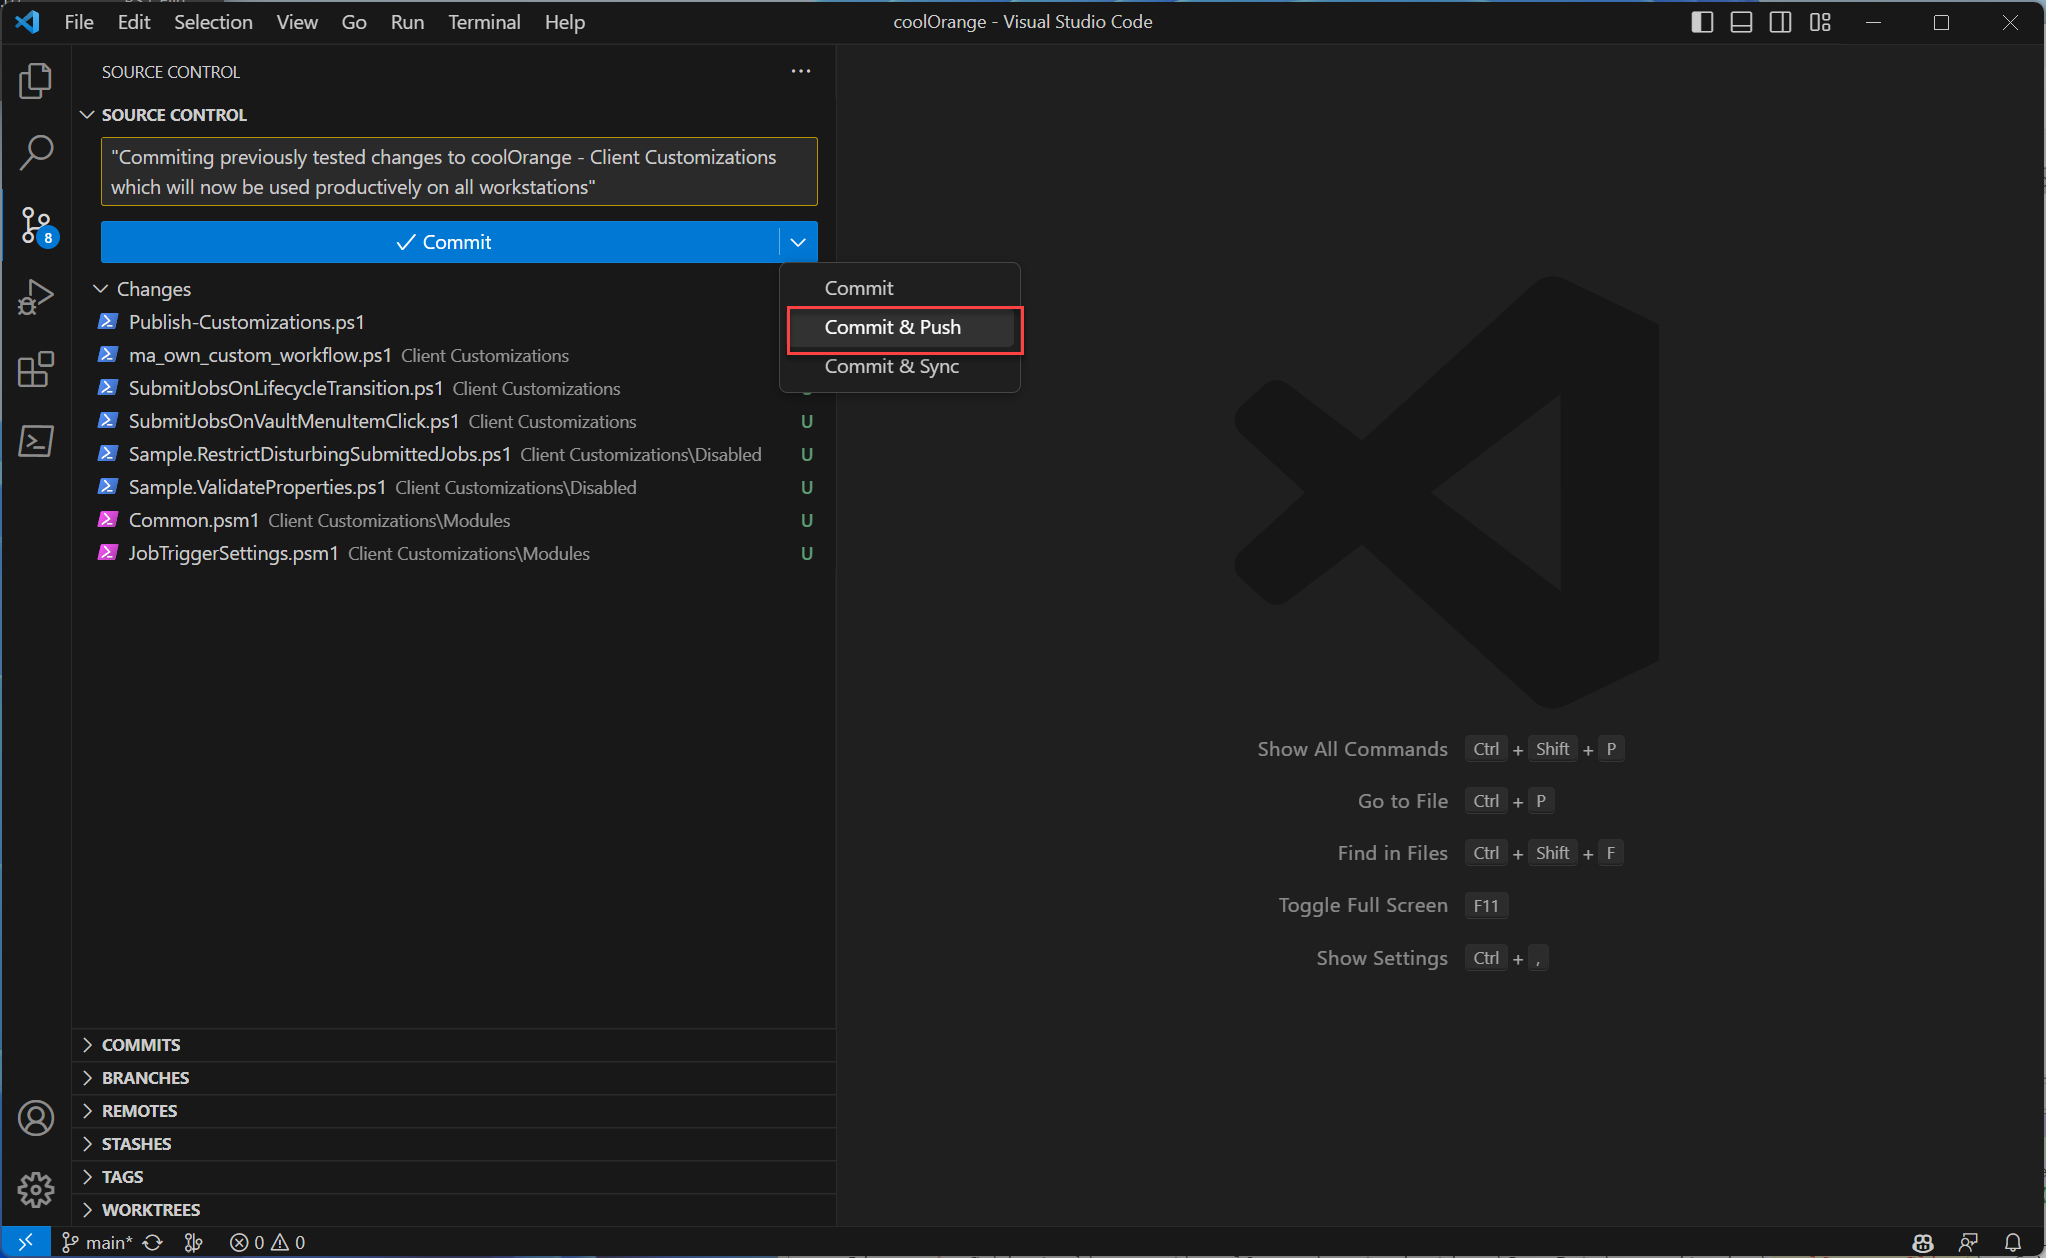
In Visual Studio Code a commit looks like this, followed by a click on the Commit & Push button:
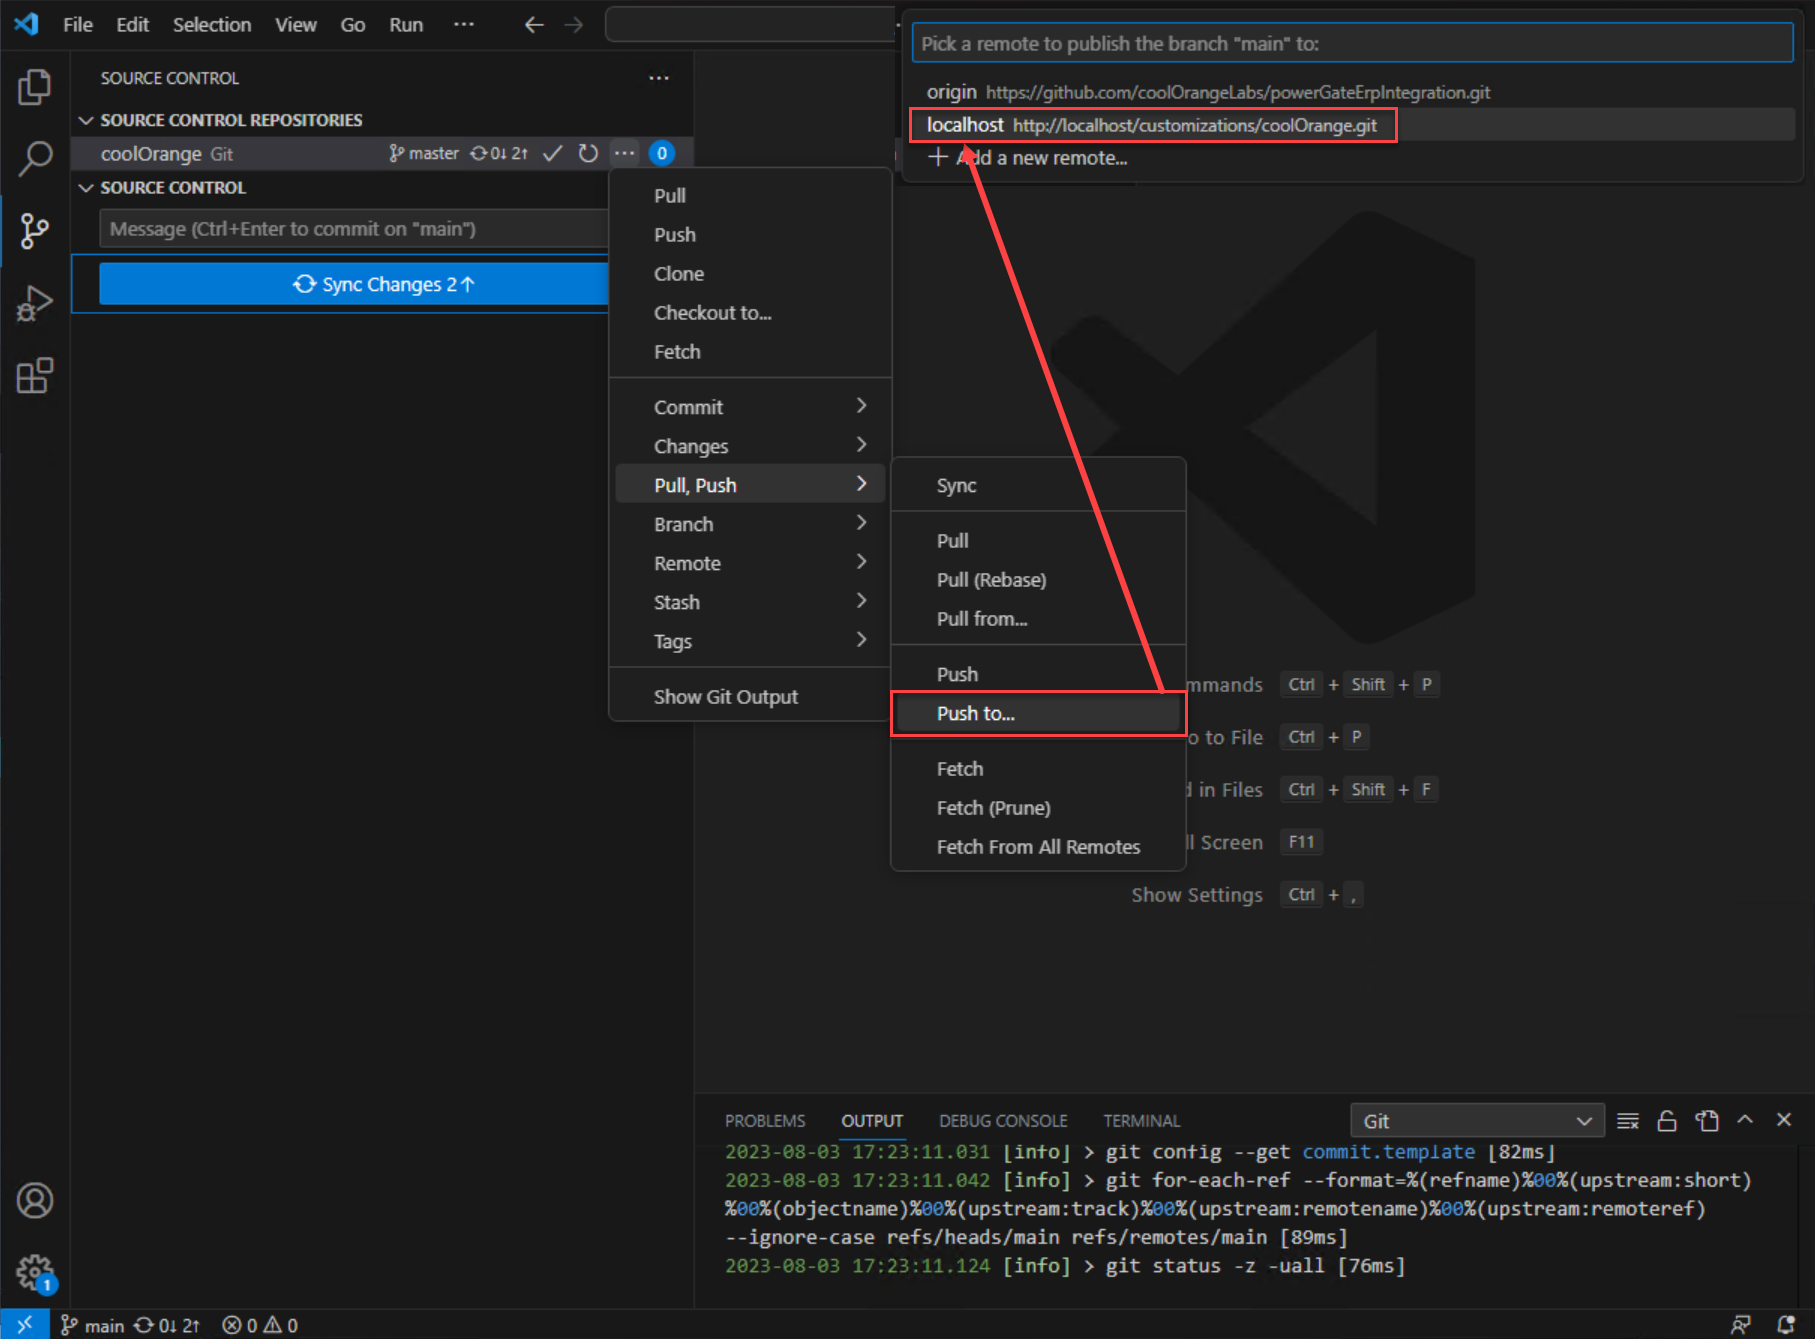
After several commits, when our customizations are in a finished state that has been successfully tested, we want to distribute them to all workstations.
For the go-live we now only need to push all commits to the Vault Server:
git push {Your_Vault_Server} master
Your customizations can now be used productively on all workstation environments which are part of this Vault site.
Git experts: Steps to configure the local git repository manually (if no other git system is used)
The repository coolOrange.git can not simply be cloned into a non-empty C:\ProgramData\coolOrange\ directory.
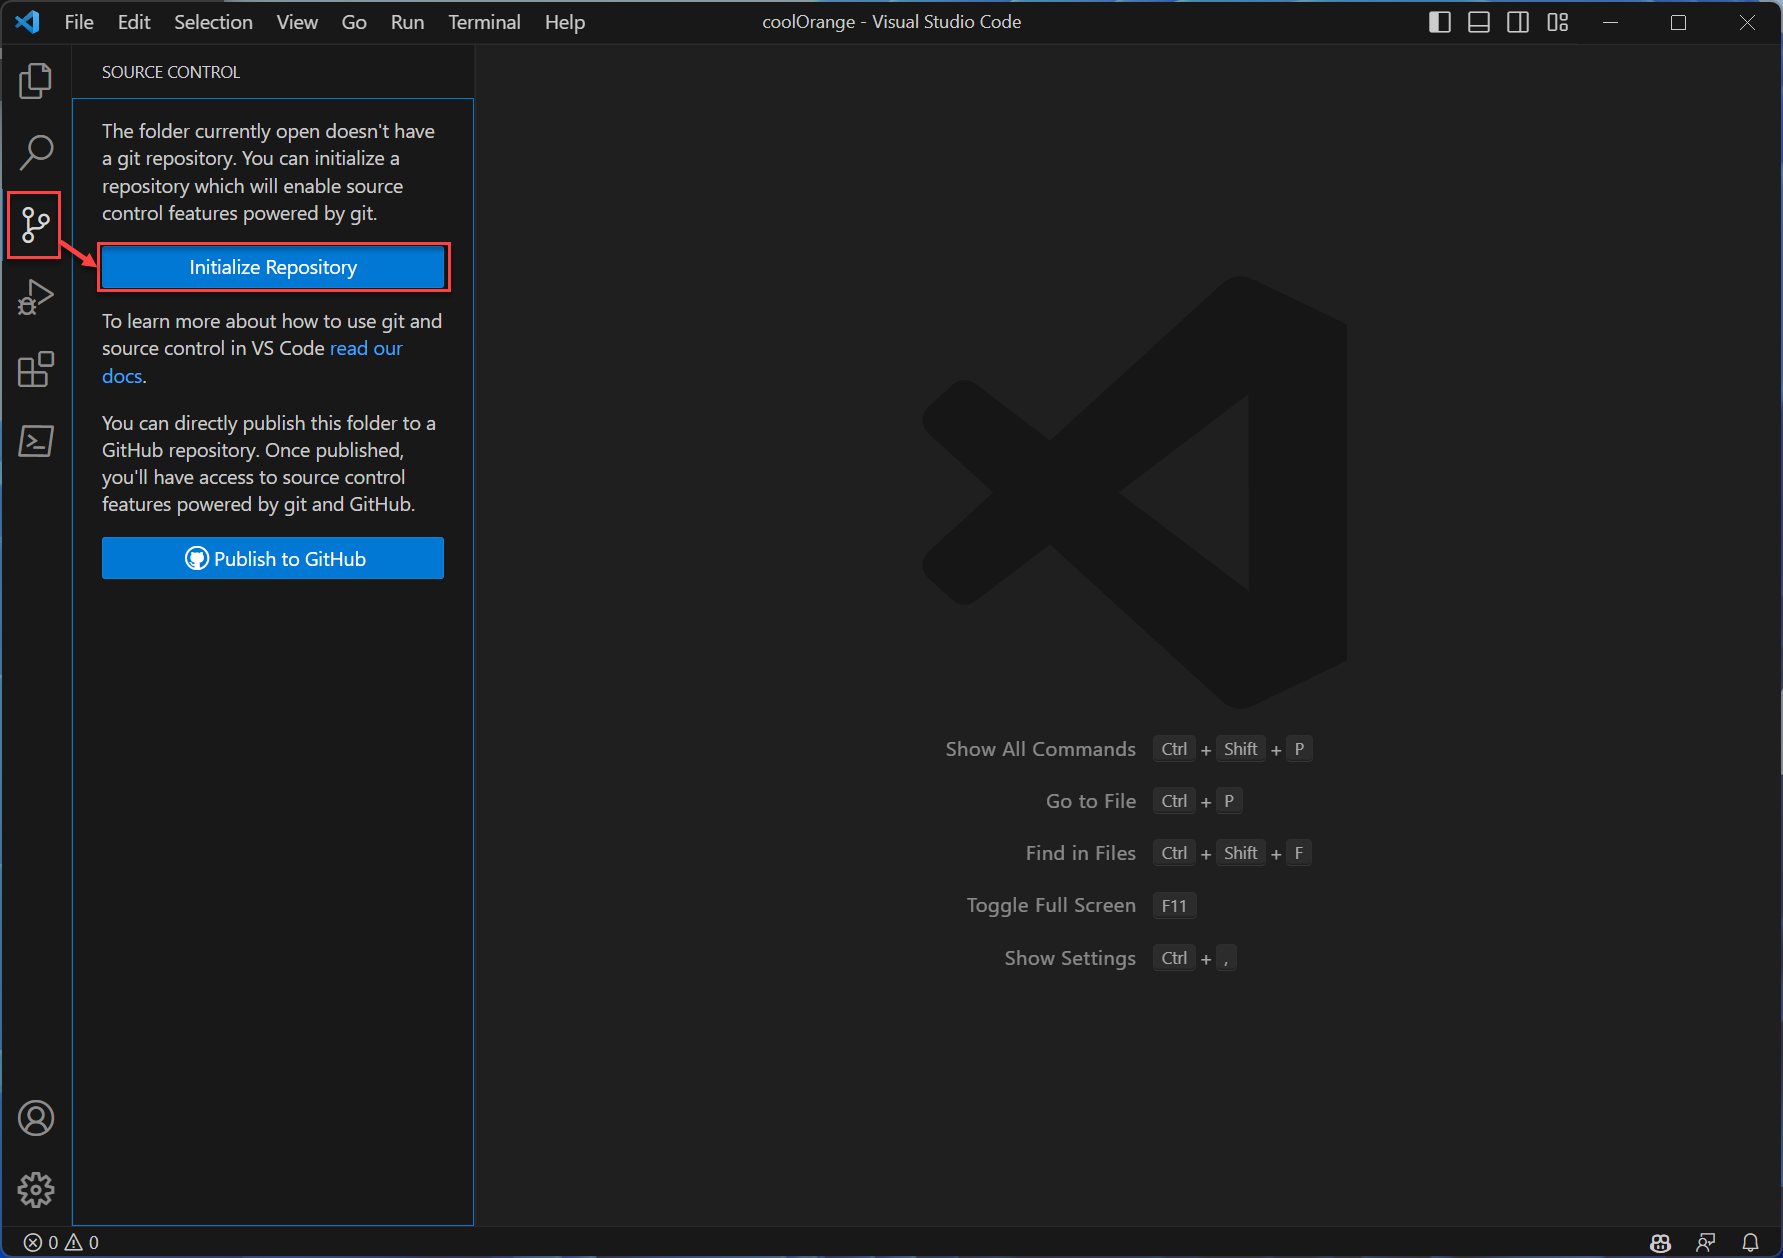
However it is possible to initialize the current directory as local repository in the same way as the Publish-Customizations script does.
First add the repository coolOrange.git as remote with the name of your Vault Server:
cd 'C:\ProgramData\coolOrange\'
git init
git remote add {Your_Vault_Server} http://{Your_Vault_Server}/customizations/coolOrange.git
These steps can also be performed in development environments like Visual Studio Code:
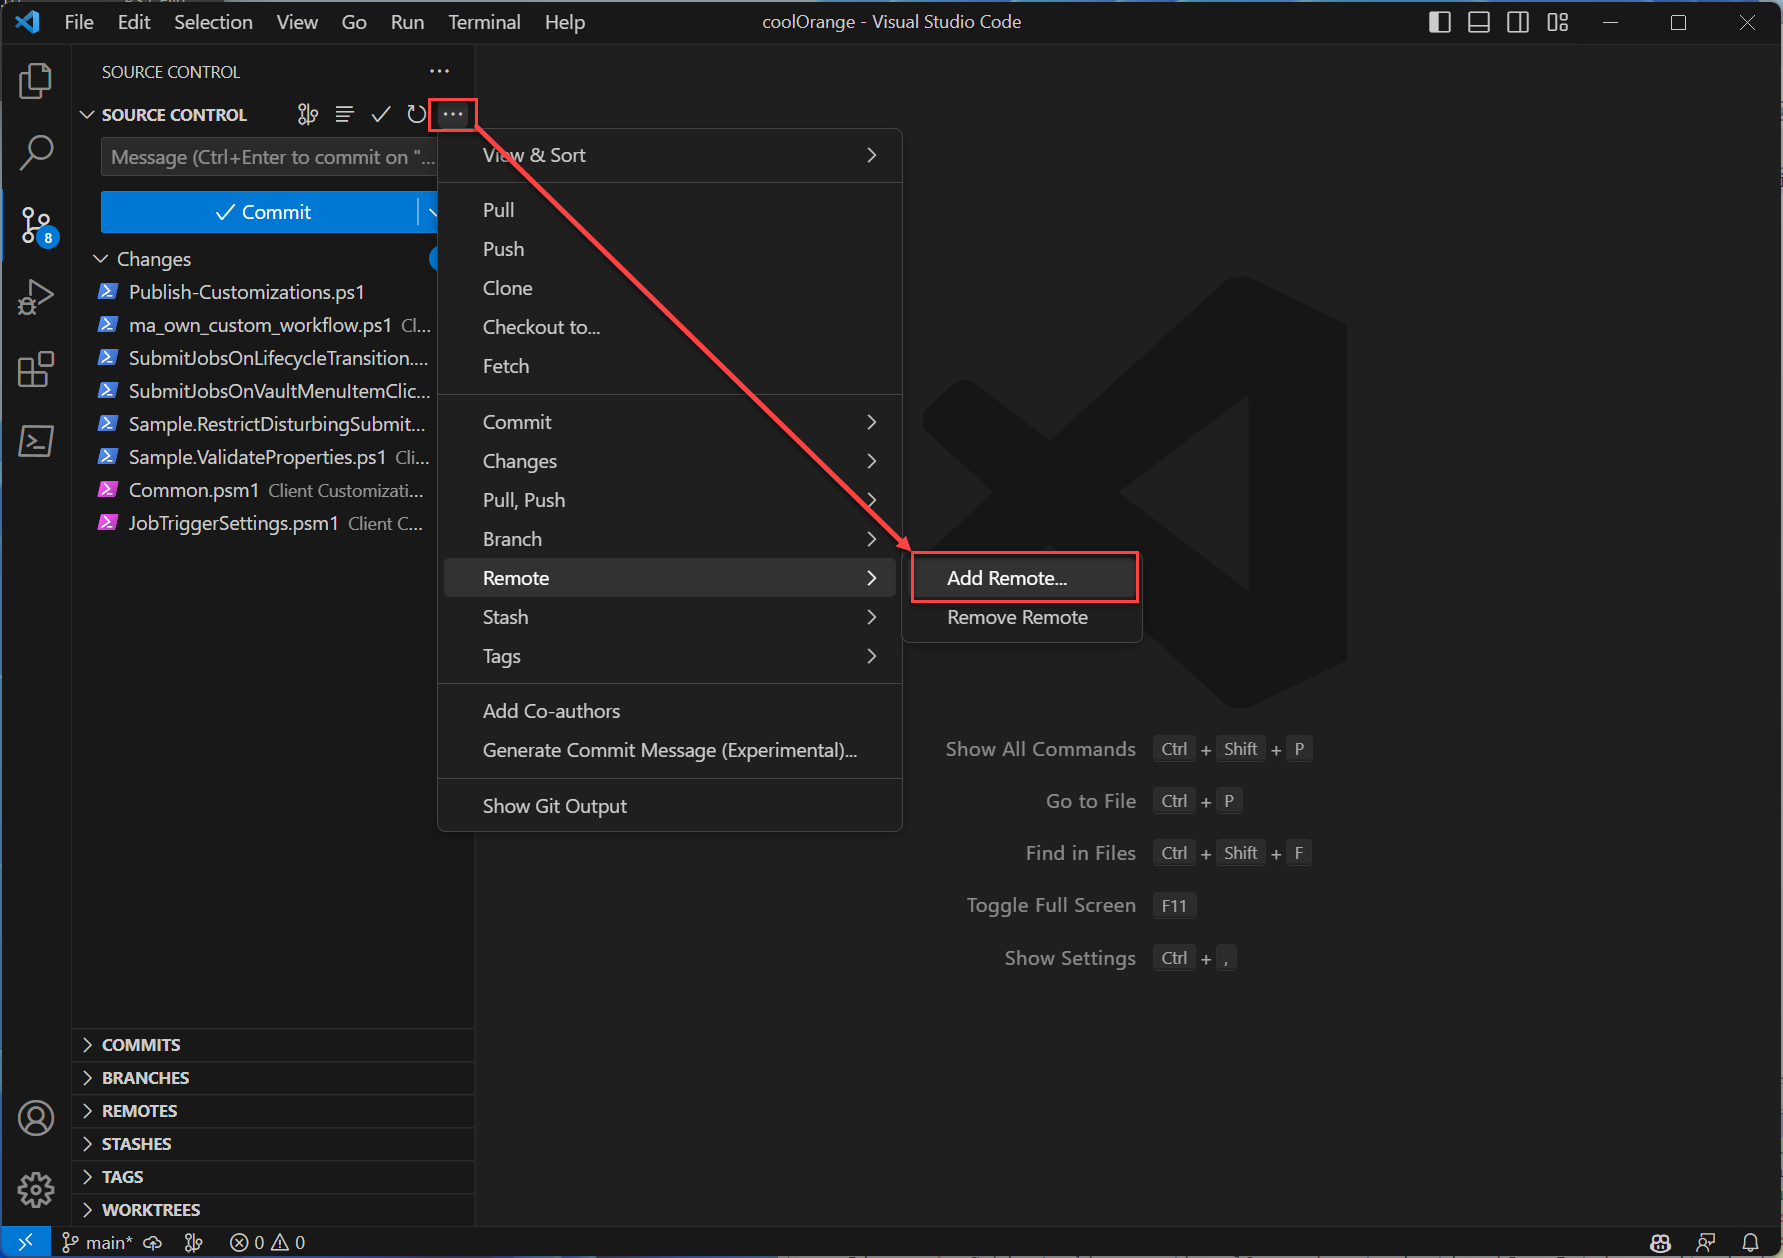
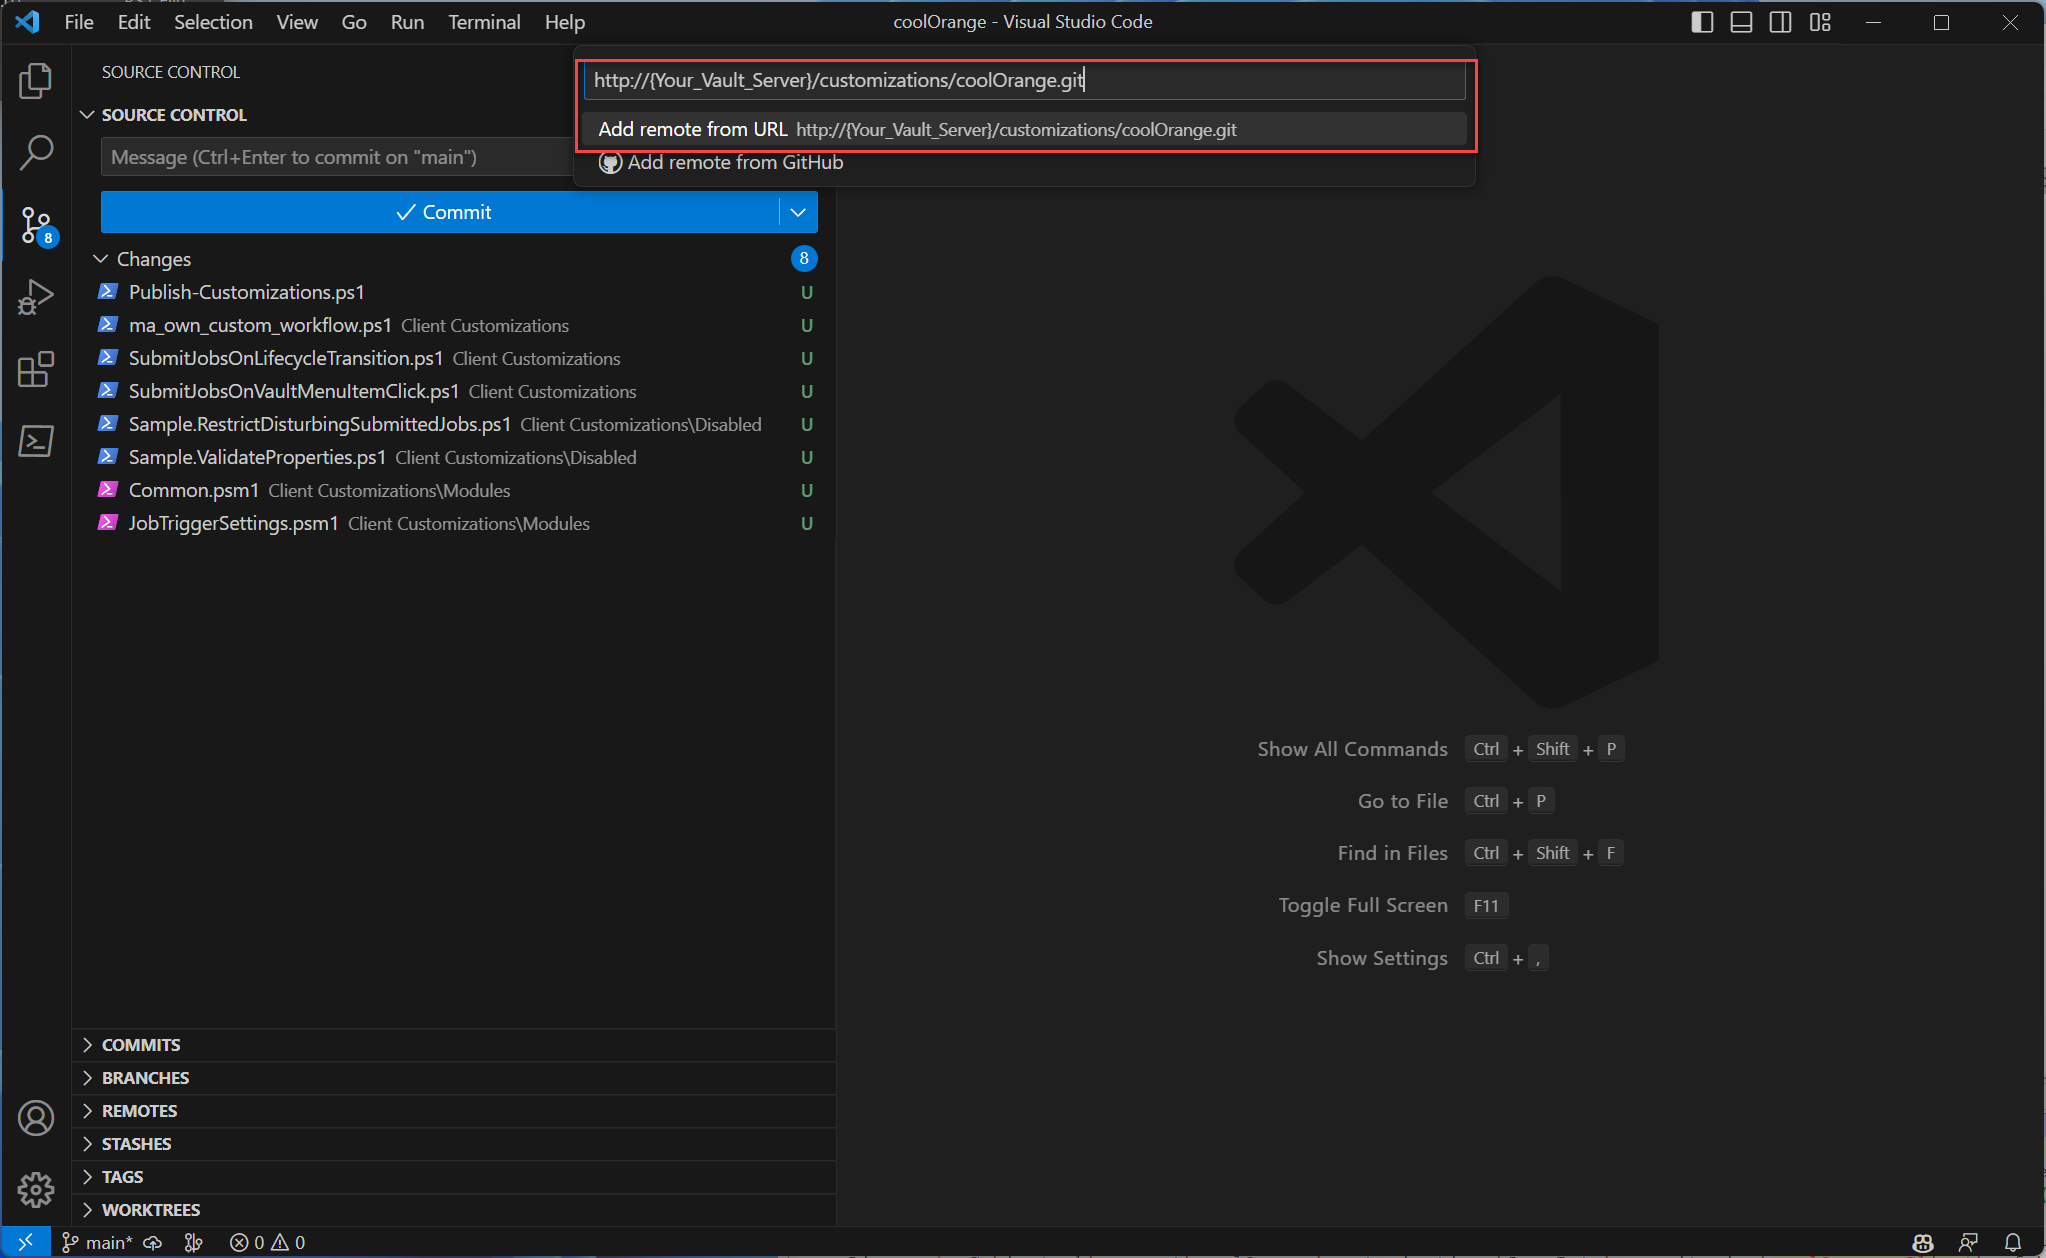
Please be sure to give your remote the name of your Vault Server!
Then create a local master branch for which the previous remote is set up as the primary remote. This enables simple Pull & Push operations to the Vault Server repository.
Set your Git username and email address if no global credentials are stored yet:
git config user.name "Your Name"
git config user.email "youremail@yourdomain.com"
All customization files in the local master branch are committed with a meaningful commit message.
Afterwards this commit can directly be pushed to the coolOrange.git repository:
git add "Client Customizations"
git commit -m "..."
git push
In Visual Studio Code a commit looks like this, followed by a click on the Commit & Push button:
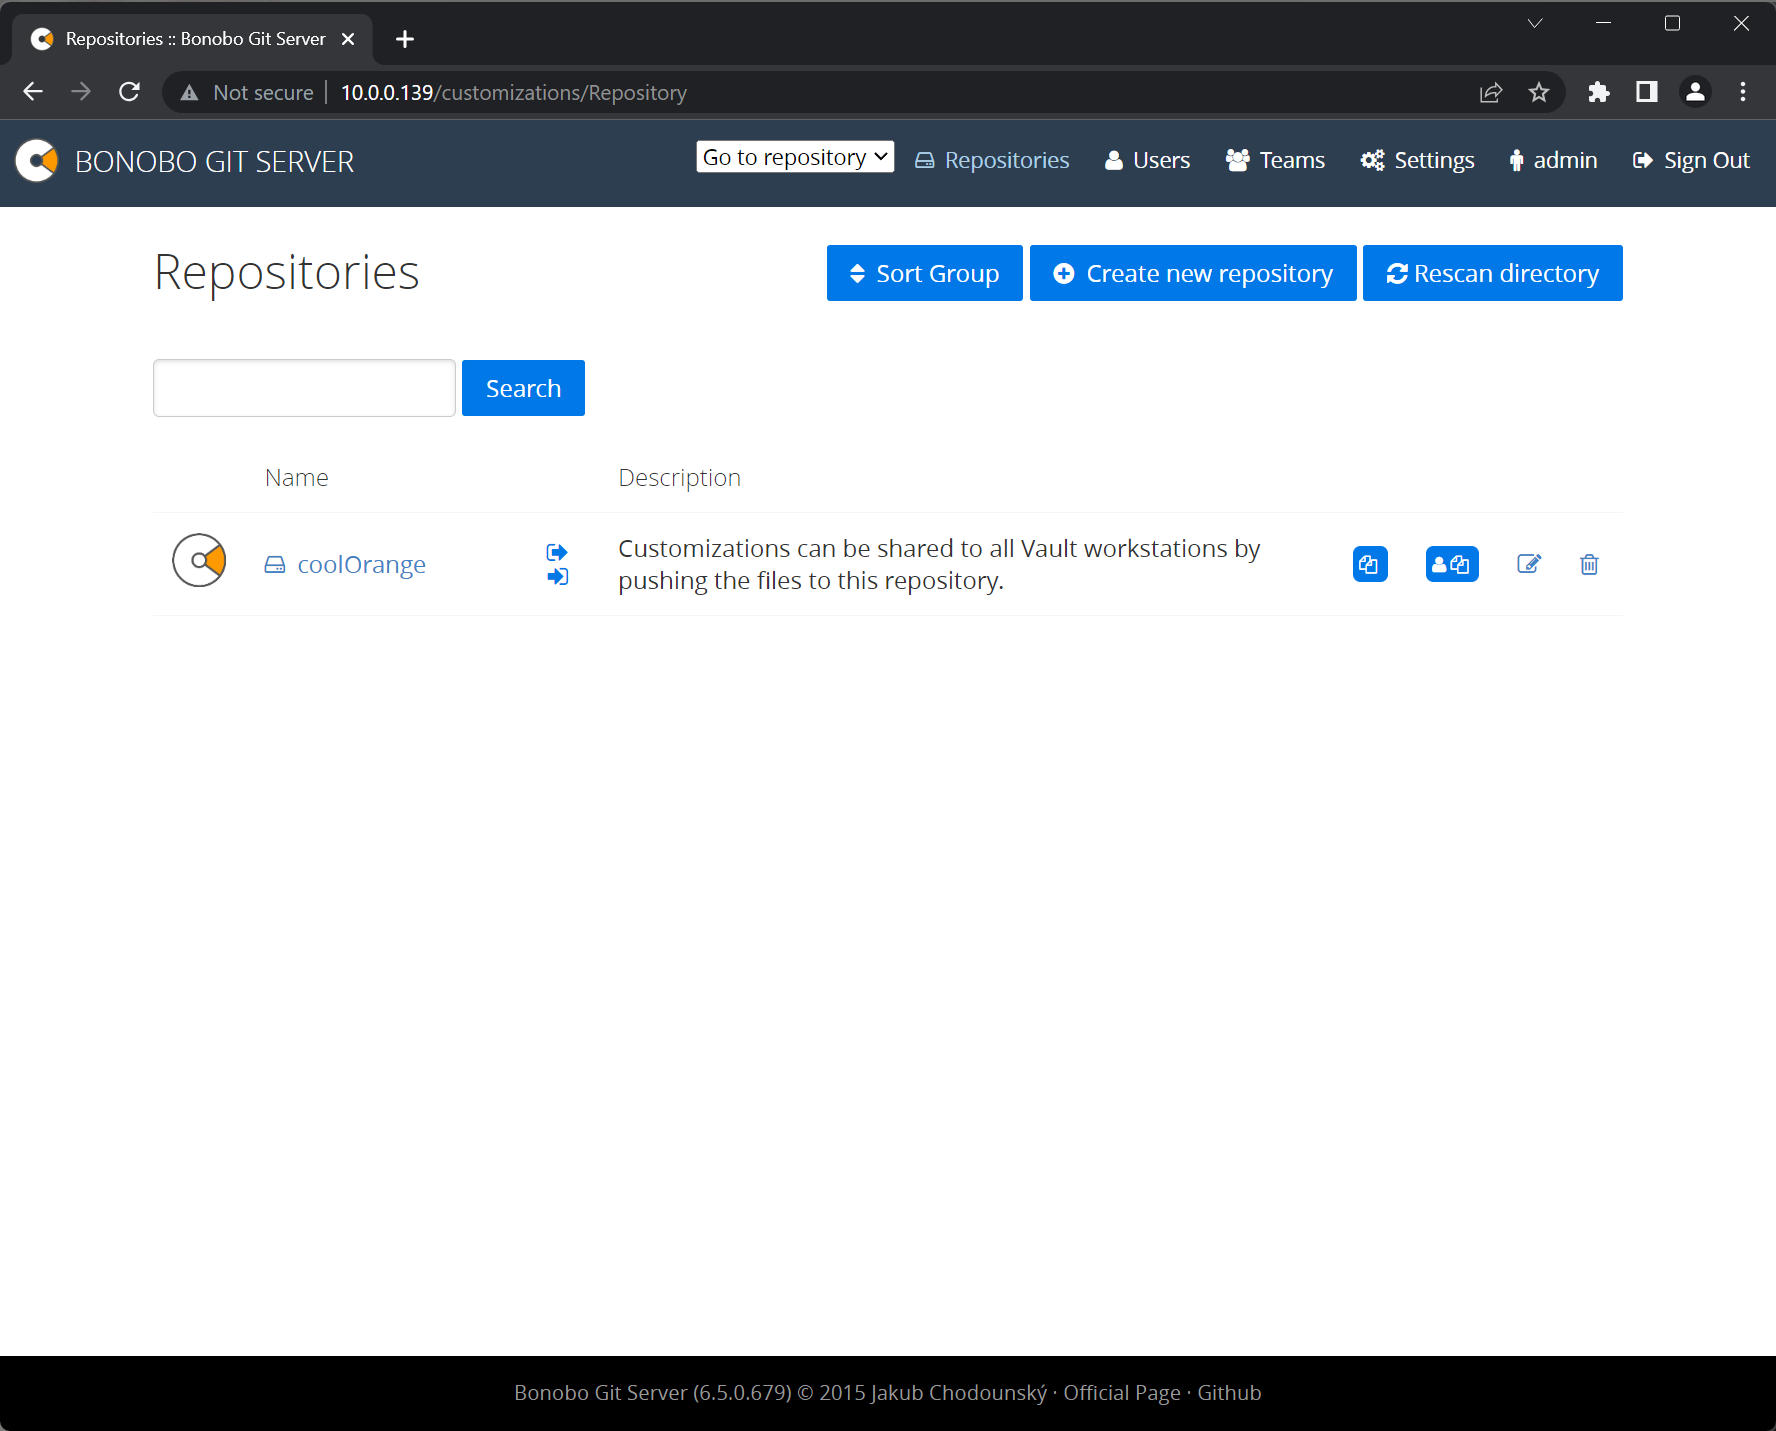
View customizations using Bonobo Git Server
Launch your browser and go to http://{Your_Vault_Server}/customizations.
Now you can see the initial page of Bonobo Git Server and you can login with the default credentials username: admin password: admin.
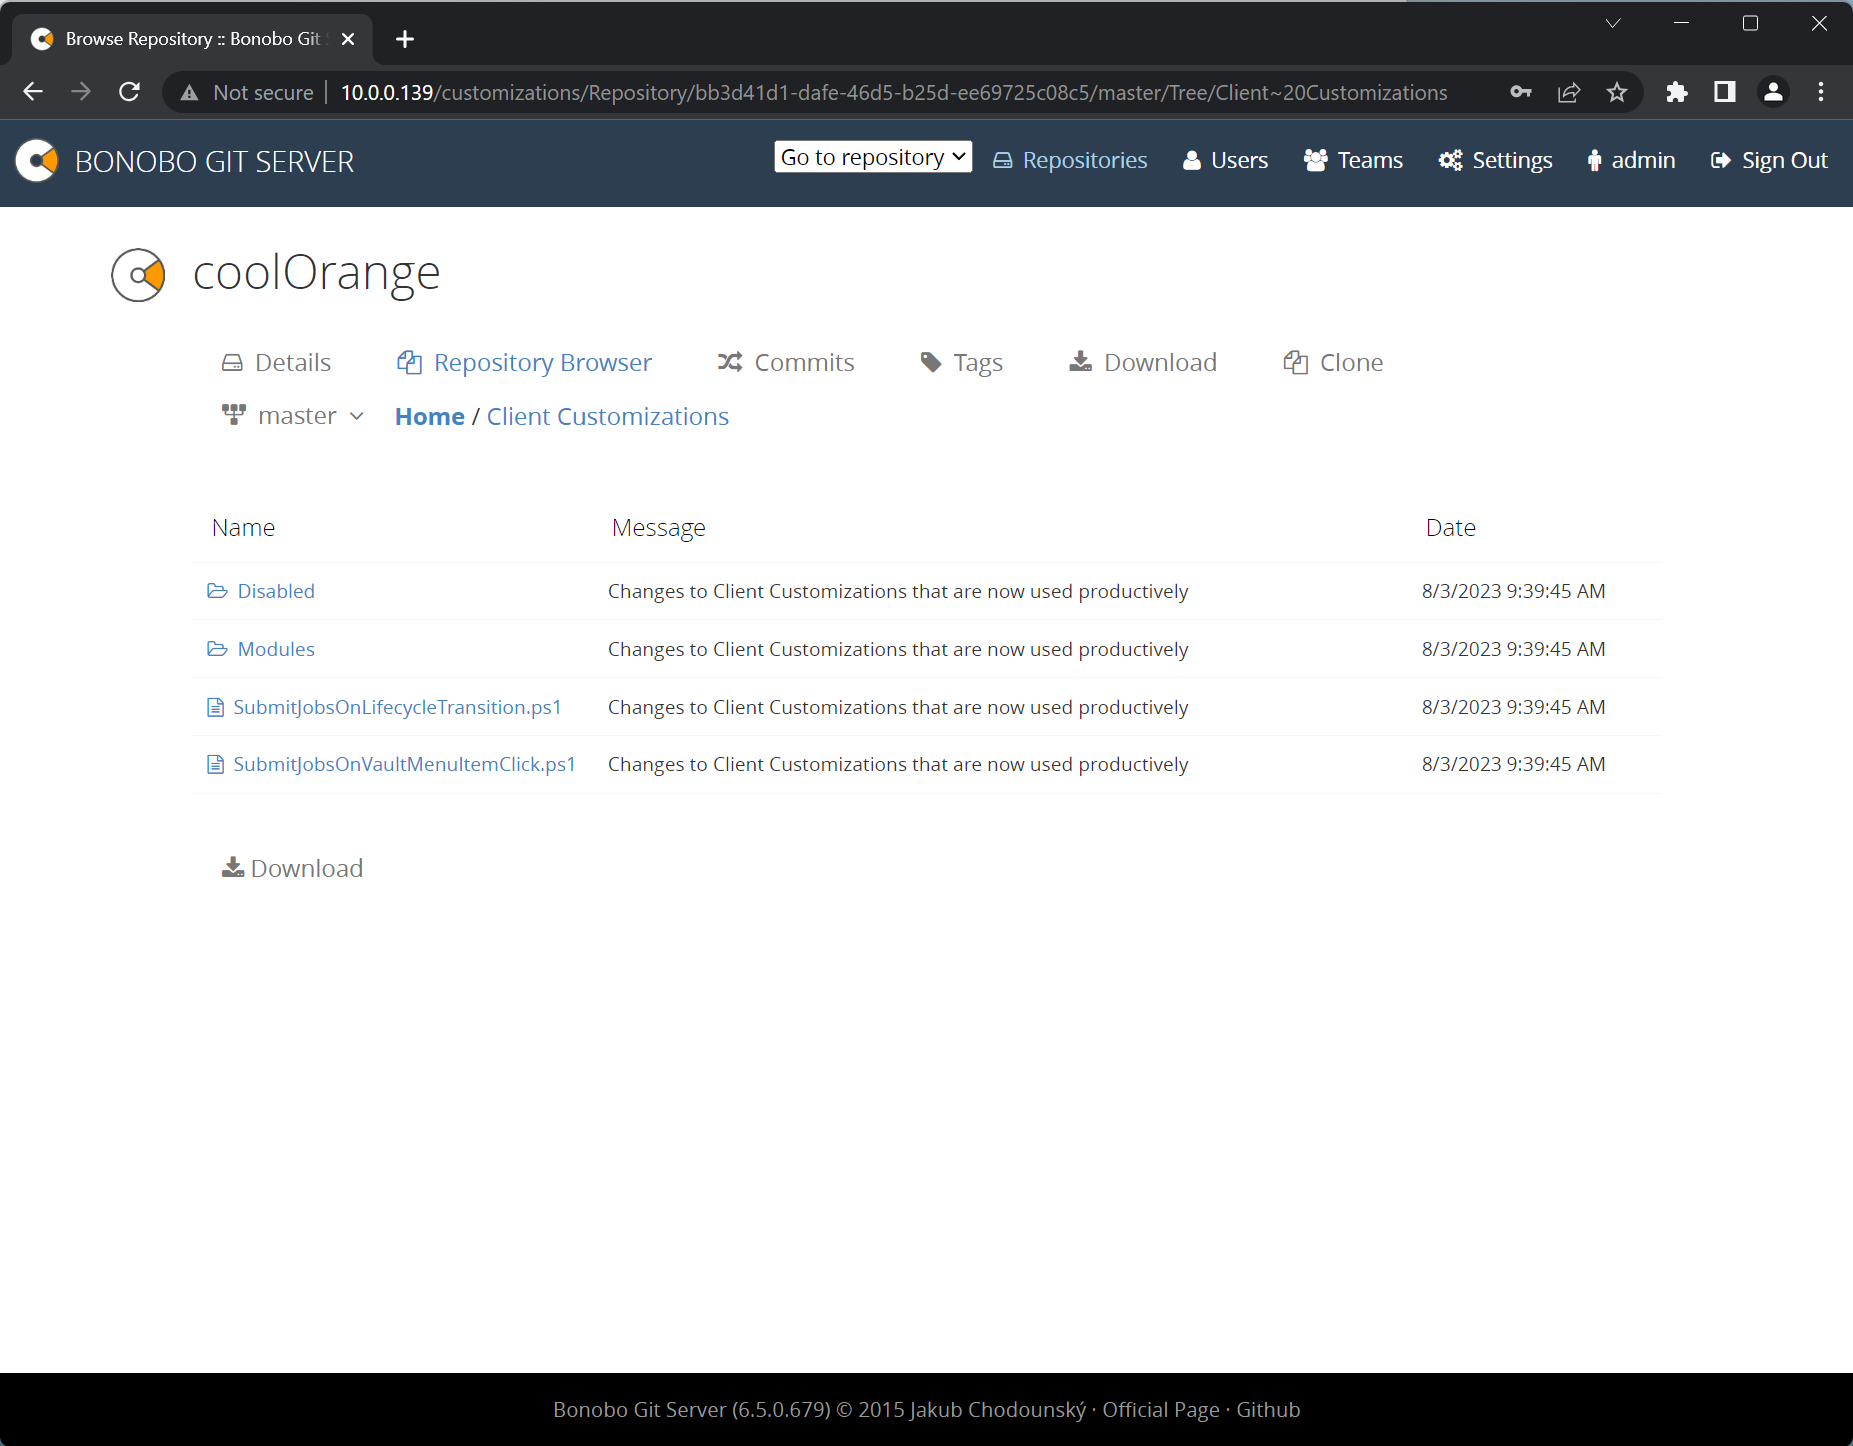
Afterwards you can view the currently published customizations, their publish date, commit messages and more.