Applications
In a powerJobs Processor context, entities that support a specific set of operations e.g. opening or exporting a file, are referred to as Applications.
These Applications are used by the powerJobs Processor Cmdlets to perform their actions on documents.
Available Applications can be accessed in the $Host.Applications variable in a Job Environment.
The product also provides an option to extend or implement new and existing Applications.
Supported Applications
The following Applications can be used in Jobs out of the box:
Application |
Note |
|---|---|
|
Autodesk Inventor supports opening, manipulating and converting 3D mechanical designs, 2D drawings (Inventor and AutoCAD) as well as presentation files. |
|
Inventor Server is a headless version of Autodesk Inventor and is noticeably faster in starting and processing jobs, but there are no GUI features available. |
|
DWG TrueView is a file viewer for 2D drawings (AutoCAD and Inventor), which in contrast to AutoCAD, only supports conversions to PDF and DWF formats. |


Note: Remote control of AutoCAD is currently not available out of the box, as exports of AutoCAD drawings are already fully supported through the previously listed applications.
For a detailed overview of supported conversions per application, visit the File Conversion page.
Registration
These default applications are registered in the coolOrange.Applications.psm1 module with the following lines:
18 19 20 | Register-Application ([powerJobs.Application.Inventor.Application]) Register-Application ([powerJobs.Application.Inventor.Server.Application]) Register-Application ([powerJobs.Application.TrueView.Application]) |
Their registration order may affect which application is used from the Open-Document cmdlet to open files, if it is called without -Application parameter.
The Register-Application function expects an application’s Type to be passed and registers this application globally via its Name.
Since the passed Type must implement the IApplication interface, this function can also be used to register custom applications.
Custom Applications
Custom applications can be implemented to extend the capabilities of all document related cmdlets, for example when opening or exporting specific file formats is required.
To implement the necessary .NET interfaces, you first need to install powerJobs Processor on your development machine.
Your project must target:
.NET Framework 4.7 for Vault Job Processor 2023-2025
.NET 8 for Vault Job Processor 2026
For compatibility across all versions, we recommend targeting .NET Standard 2.0 if possible. This ensures that your implementation is automatically supported in all Job Processor and development (debug) environments.
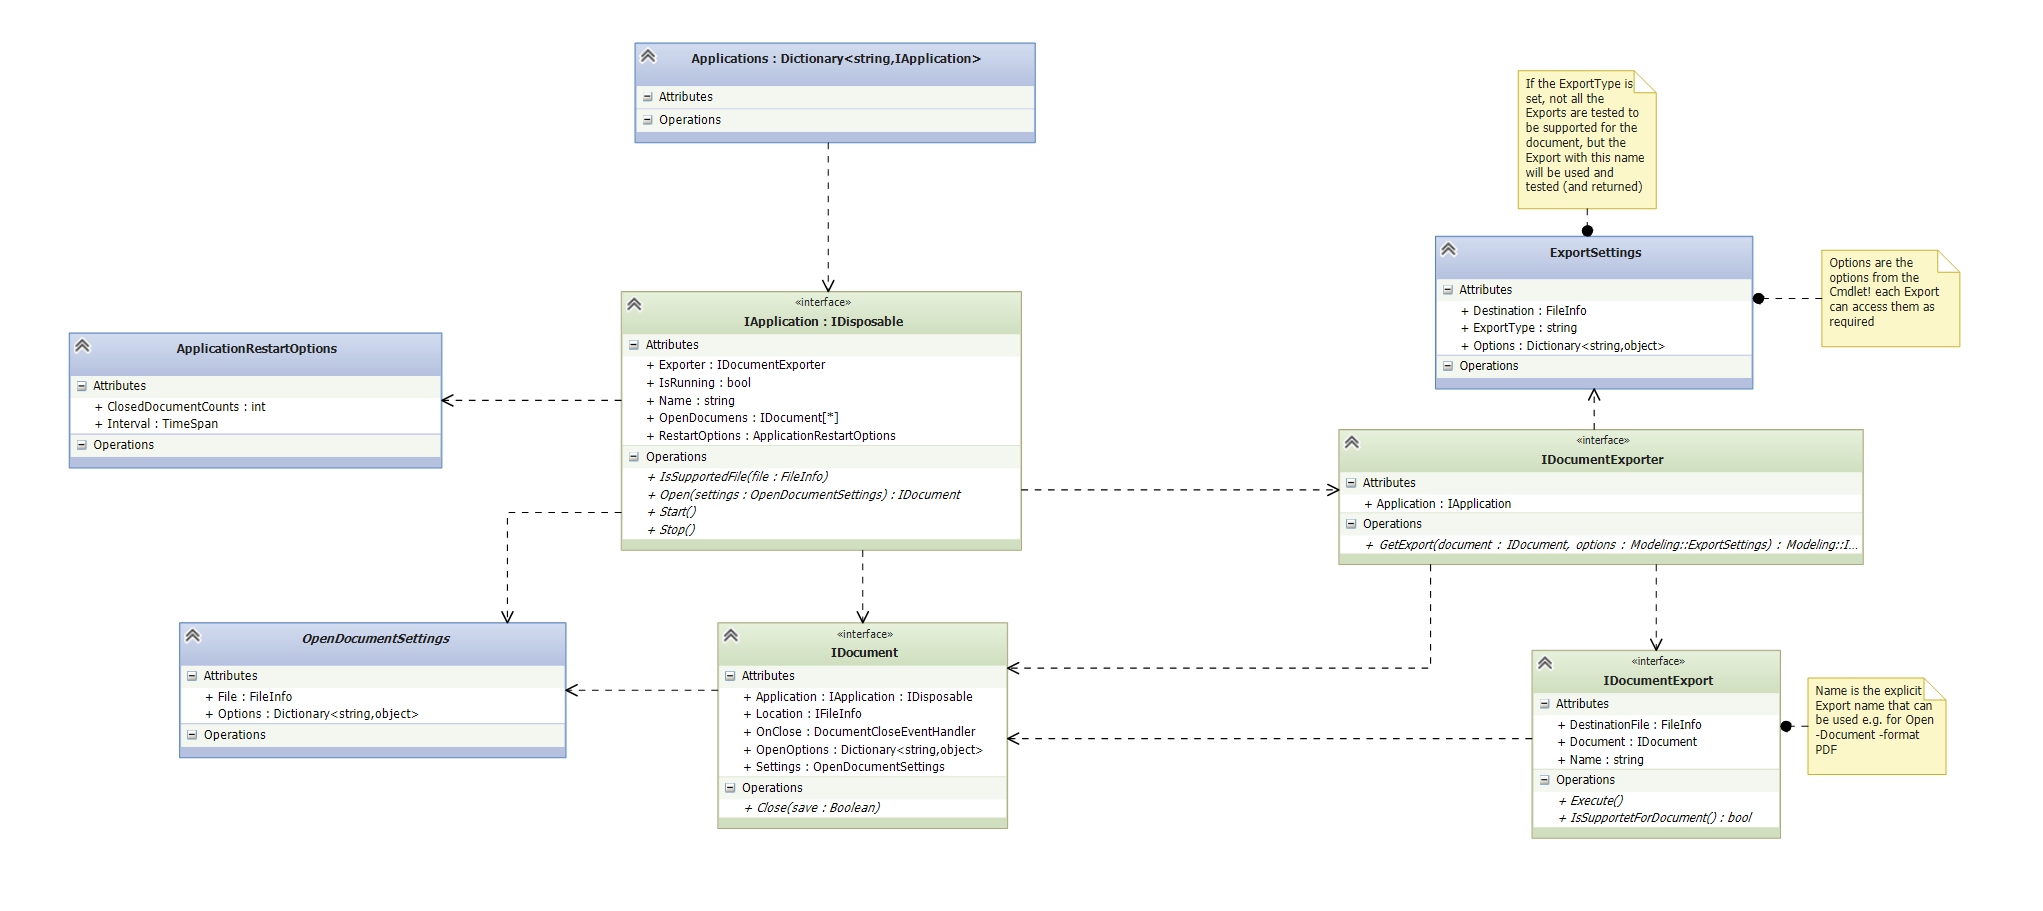
IApplication Interface
The API for Applications is designed around the IApplication interface and also includes types like IDocument, IExport, ect. and is designed as follows:
Visual Studio Project setup for Custom Applications
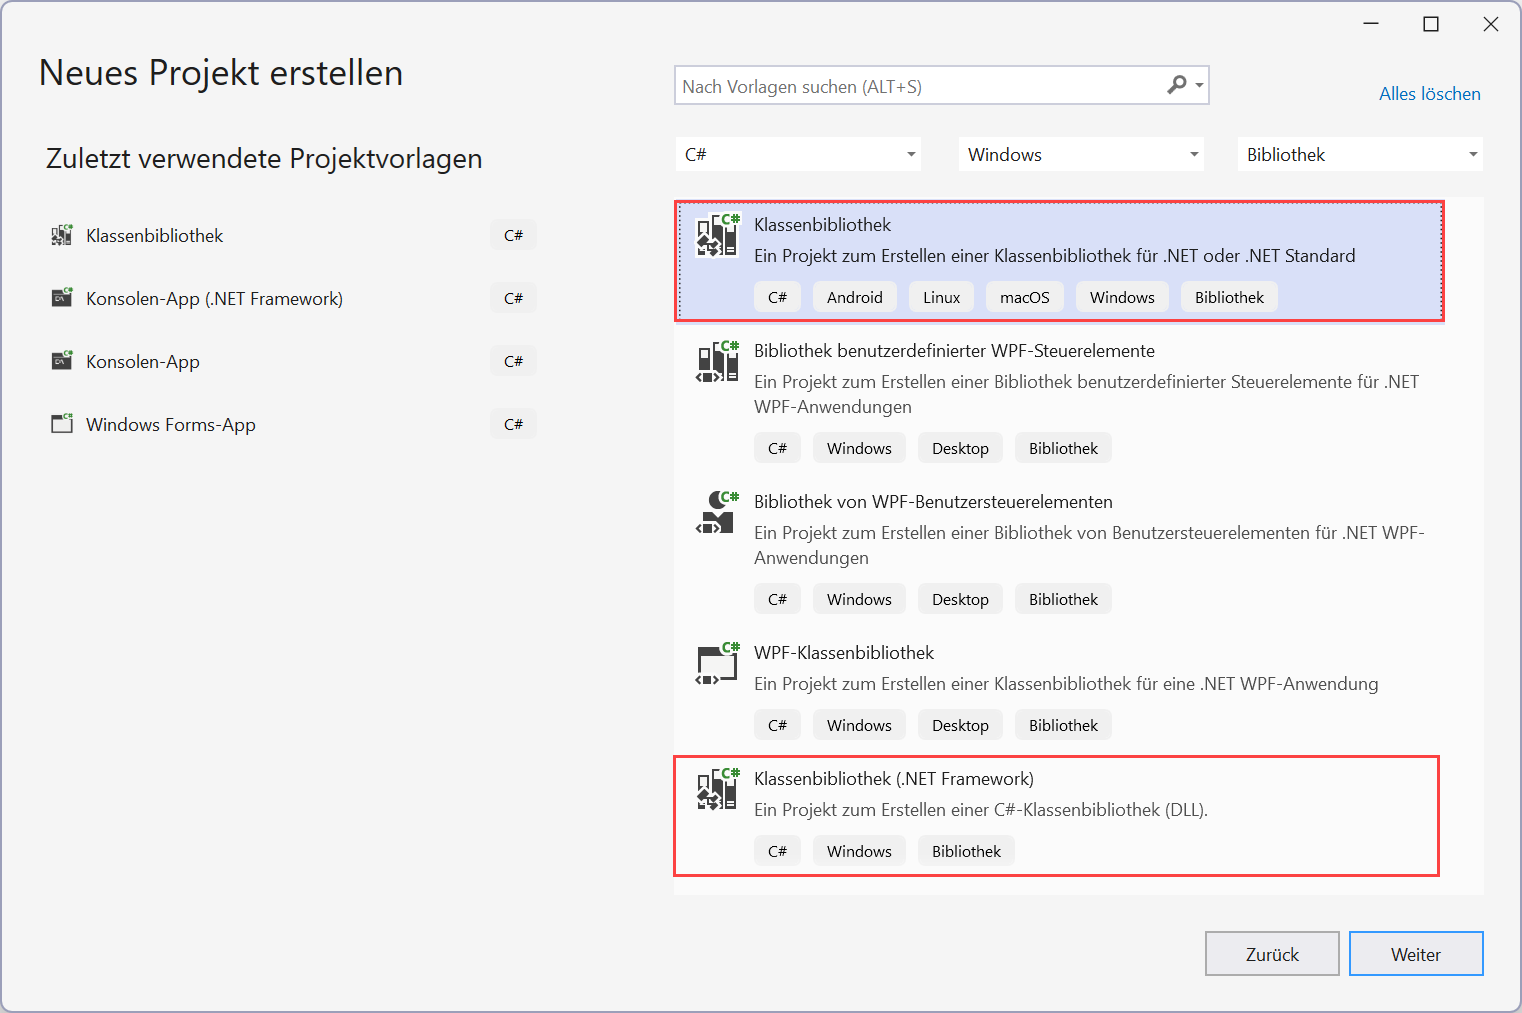
1. Create a new Solution in VisualStudio
Choose a new project of type Class Library with the name of your application:
Choose the name of the custom application and the target framework:
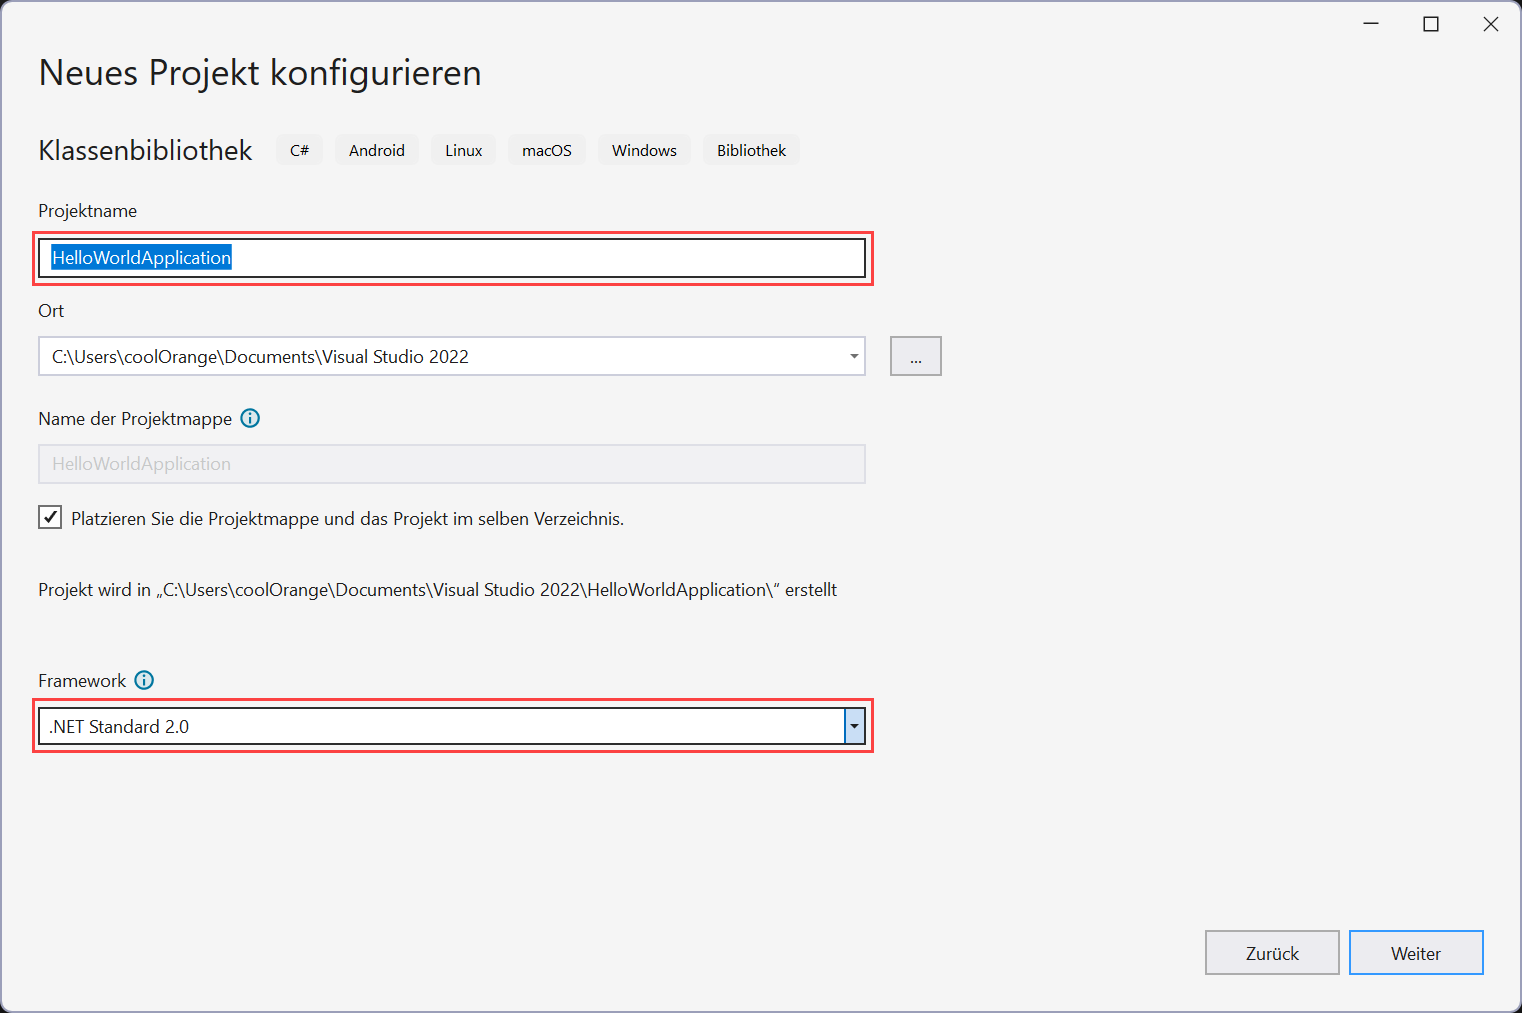
The new project should have the following settings:
Output Type: Class Library
Target Framework: .NET Standard 2.0 (
netstandard2.0) - recommended
Alternatively, use .NET Framework 4.7 (net47) for Vault 2023-2025, or .NET 8 (net8.0-windows) for Vault 2026Platform Target: Any CPU
To ensure that the correct target framework version of your dependencies (e.g., from NuGet packages) is copied into the output directory, you should add the following MSBuild properties to your .csproj file:
<PropertyGroup>
    <RuntimeIdentifier>win-x64</RuntimeIdentifier>
    <CopyLocalLockFileAssemblies>true</CopyLocalLockFileAssemblies>
</PropertyGroup>
2. Reference the powerJobs.Common assembly
In Visual Studio right-click on References and click “Add References”.
Add a reference to the powerJobs.Common.dll assembly from the powerJobs modules directory:
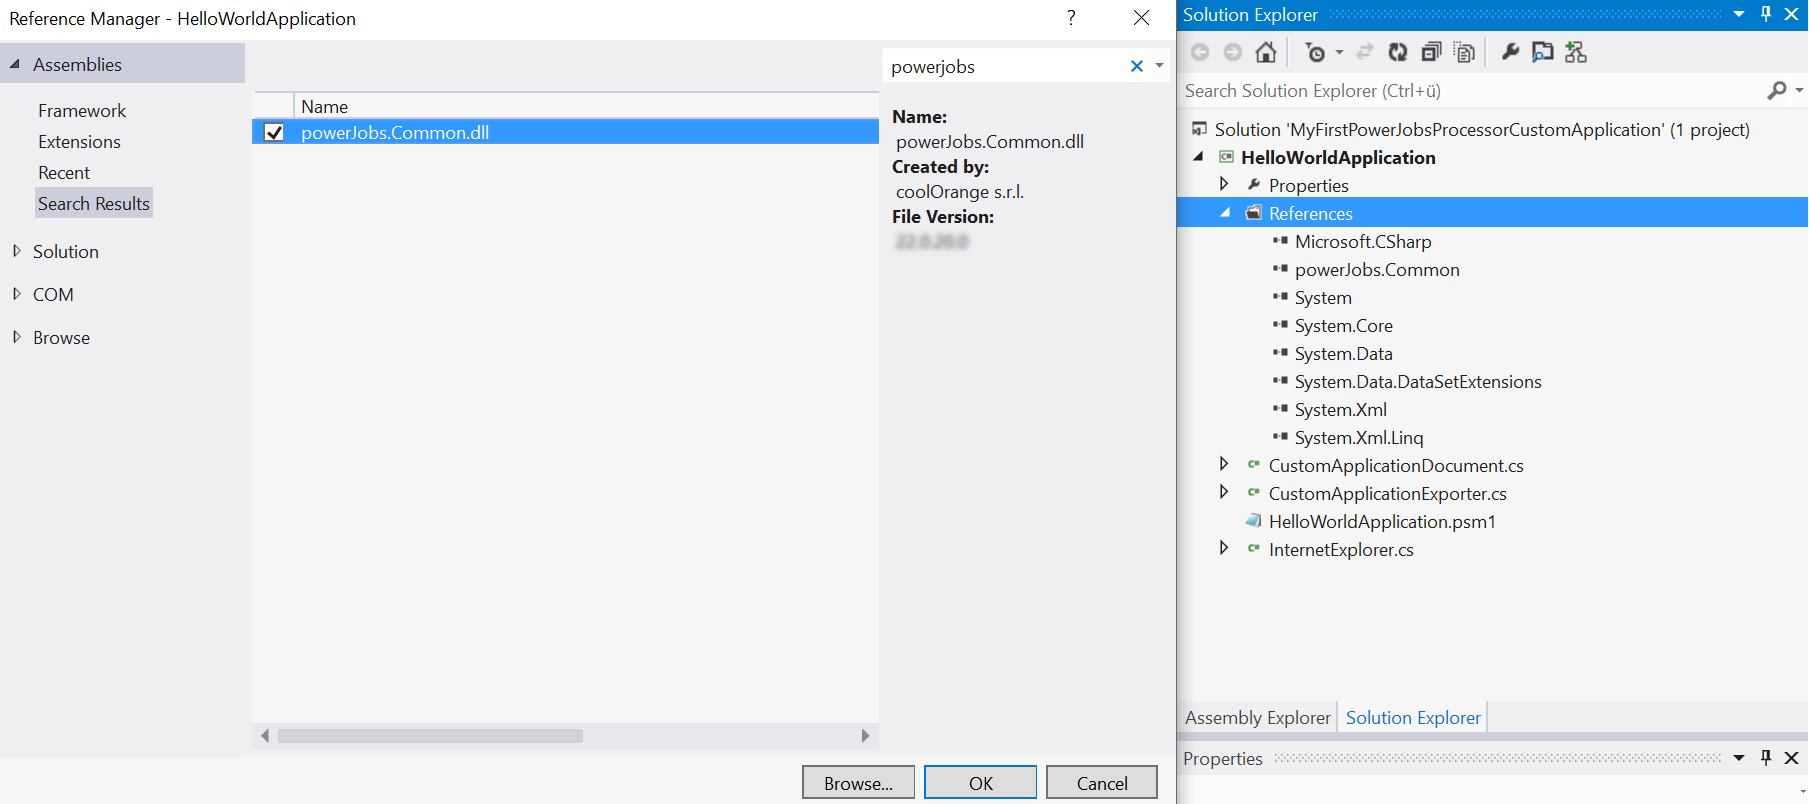
For .NET Framework projects the library can also be easily referenced from the GAC; for .NET 8 and .NET Standard projects, please reference it directly from C:\Program Files\coolOrange\Modules\powerJobs.
In both cases, “Copy Local” should be set to “false”.
3. Create an IApplication implementation
In order to gain access to the IApplicaiton interace, the following namespace should be imported:
using powerJobs.Common.Applications;
Now we can define our Application class which implements the IApplication interface and handles the start and stop functionality.
In order to prevent troubles with long running applications, we recommend to derive your class from powerjobs.Common.Applications.ApplicationBase and implement the functionality IsRunning properly.
This will allow powerJobs Processor to automatically restart this application whenever required.
Note that the Application will only open documents configured in the IsSupportedFile (or SupportedFileTypes) functionality!
4. Create an IDocument implementation
The closing functionality should be implemented properly, in order to have no unmanaged resources lying around in memory later.
The constuctor can use the OpenDocumentSettings parameter for opening the correct file.
Additional all the options passed from the Open-Document cmldet can be consumed.
We recommend to derive your Document class from the powerjobs.Common.Applications.DocumentBase class.
The function OpenDocument of the custom application class (Step 3) must be extended to return an instance of this Type.
If the application is derived from powerjobs.Common.Applications.ApplicationBase, you just need to return a new instance of your class in OpenDocument_Internal(OpenDocumentSettings openSettings).
Now the cmdlets Open-Document and Close-Document should already work.
5. Create an IDocumentExport implementation
The exporter takes care about different export formats and decides which export should be used from Export-Document.
The Application property IDocumentExporter Exporter has to be set to an instance of this IDocumentExporter. We recommend to derive your DocumentExporter class from powerjobs.Common.Applications.DocumentExporterBase class which handles multiple DocumentExports depending on the file format.
Even multiple exports can be registered in this class later.
For the moment a single IDocumentExport implementation can be provided.
Based on the name of this export (e.g. “PDF”), the DocumentExporter can decide to take this export when required.
We recommend to derive your DocumentExport class from the powerjobs.Common.Applications.DocumentExportBase class.
After deriving from the class implement all the abstract functions.
By specifying the SupportedDocumentTypes your export will be called only for the specified formats.
The real export logic has to be implemented in the Execute function.
You can use the ExportSettings to gain access to the options passed to the Export-Document cmdlet.
6. Deploy to Modules directory
Next copy your application assembly into a new folder under the Modules directory.
7. Create Module to register the application
Create a new module in the modules directory and register your application in there, similar to the previously mentioned default applications:
Add-Type -Path "$($Env:POWERJOBS_MODULESDIR)\<YouApplicationFolder>\<YouApplicationAssembly>.dll"
Register-Application ([<NameSpace.YouApplicationClass>])
Now you can create your own job and pass to the Open-Document the application name of your new application:
Open-Document -Application <YourApplicationName> -LocalFile $file.LocalPath
8. Best practice: Use PowerShell Console as Start Programm
Configure the Visual Studio project to launch and load your assembly in the Windows PowerShell Console or PowerShell 7 Console (if installed) for easier testing and debugging.
In the Project Debug settings, set:
Start external program: C:\Windows\System32\WindowsPowerShell\v1.0\powershell.exe
Command line arguments: -noexit -command "Import-Module powerJobs"
9. Launch the PowerShell Console or Job Processor
Press F5 to start the PowerShell Console and the powerJobs module imports and registers your application.
You can now execute the Cmdlets Open-Document, Export-Document and Close-Document in order to debug your implementations.
At the same time the application can now be used and tested in your job.
Visual Studio Template
The Visual Studio Template creates a basic project similar to following the steps above.
Visual Studio Project Template
Download: C# Template
Installation:
Copy the zip file to your VisualStudio Templates directory %userprofile%\Documents\Visual Studio
Start VisualStudio and create a new project by using the powerJobs Processor Application project template:
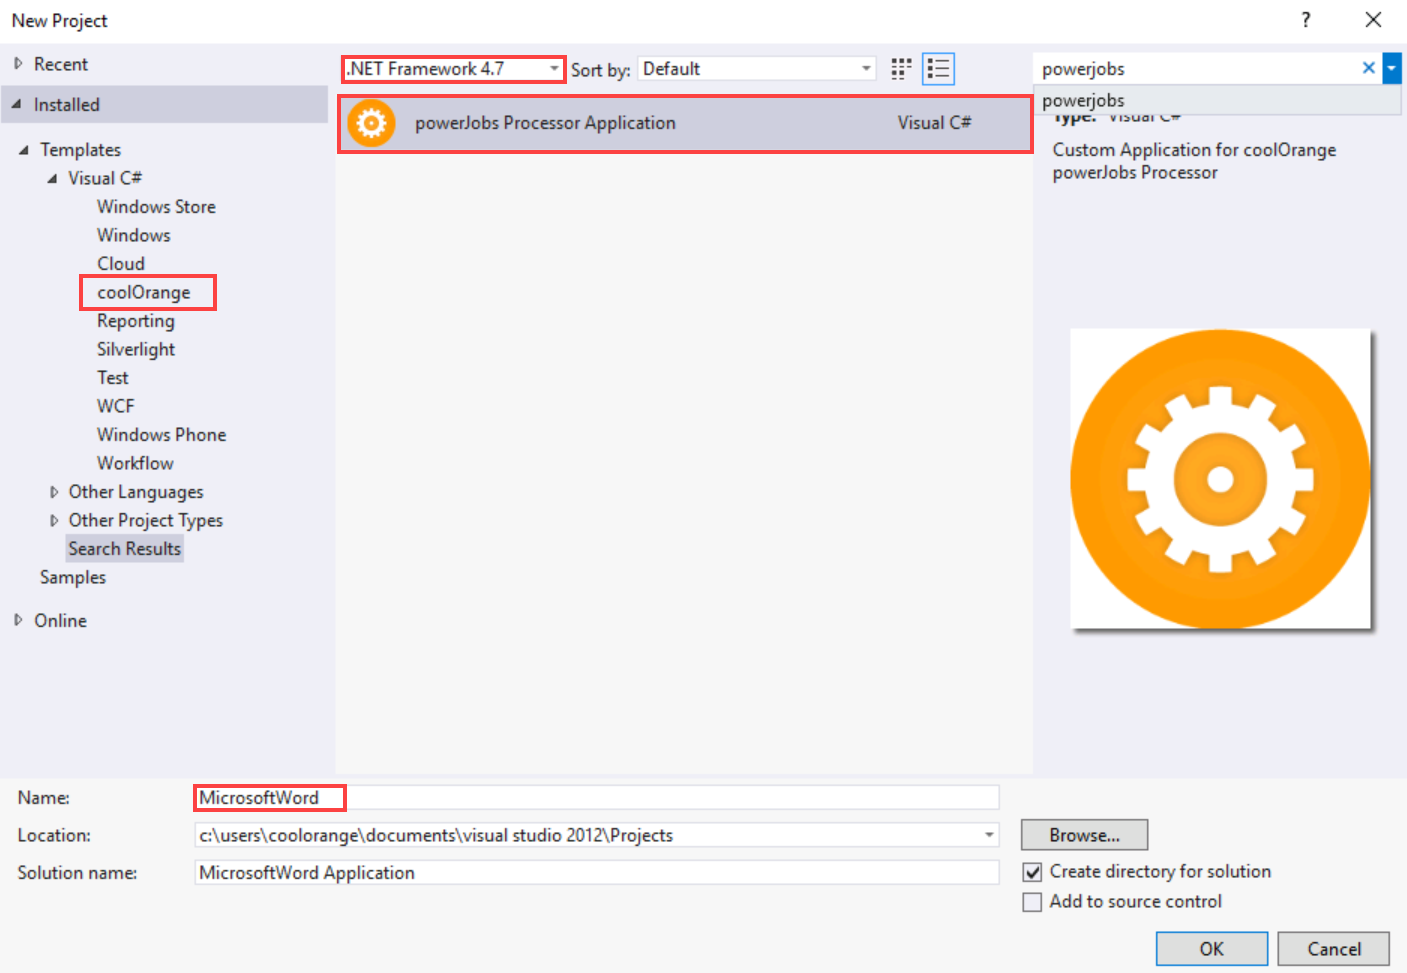
Then give your application a meaningful name (without characters like spaces or dots).
The assembly which contains your application and the according registration module will be deployed to the Modules directory, with the name of your project.
It is already configured to automatically launch the Windows PowerShell Console and import the powerJobs module when pressing F5.